
Canva's user-friendly interface serves as a powerful canvas for your creative expressions. Before diving into the intricacies of organizing designs with columns, let's familiarize ourselves with the key elements of Canva's interface.
The Dashboard
The dashboard is your starting point in Canva, providing access to a variety of design types, templates, and your saved projects. Use the search bar to find specific templates or scroll through the categories to spark your creativity.
Design Tools
Located on the left side, Canva's design tools offer a range of options, including text, elements, and backgrounds. Experiment with these tools to customize your designs. You can also upload your images or access Canva's extensive media library for inspiration.
Layers Panel
The layers panel, usually found on the right side, enables precise control over the arrangement of elements in your design. Utilize the layers panel to reorder, hide, or lock elements, ensuring a well-organized composition.
Design Area
The central canvas is where your creative ideas come to life. Click on elements to select and manipulate them. Familiarize yourself with drag-and-drop functionality to effortlessly reposition items within your design.
Navigation Bar
Above the canvas, the navigation bar provides essential functions like undo, redo, and the ability to zoom in and out. These features enhance your control over the design process, allowing for precision and accuracy.
Save and Download
Don't forget to save your work regularly using the save button in the top right corner. When satisfied with your design, click the download button to choose from various export options, ensuring your creation is ready for sharing or printing.
Tips for Efficient Navigation
Enhance your Canva experience with these tips:
- Keyboard Shortcuts: Speed up your workflow with Canva's keyboard shortcuts. For example, press Ctrl + Z to undo and Ctrl + Y to redo changes.
- Zoom In and Out: Use the zoom feature in the navigation bar for detailed adjustments or to view your entire design at a glance.
Mastering Canva's Interface Sets the Stage
Understanding Canva's interface lays a solid foundation for efficient and creative design work. As you navigate through the dashboard, experiment with design tools, and familiarize yourself with essential features, you'll be well-equipped to tackle the next step in our journey: creating organized columns for visually stunning designs.
Creating Columns in Canva
Unlock the potential of your designs by incorporating columns in Canva. Columns bring structure and clarity to your compositions, making them visually appealing and easy to navigate. Follow these steps to master the art of creating columns in Canva:
Step 1: Select Your Design
Start by selecting the design type you want to work on from the Canva dashboard. Whether it's a social media post, presentation, or poster, columns can enhance the layout and organization of your content.
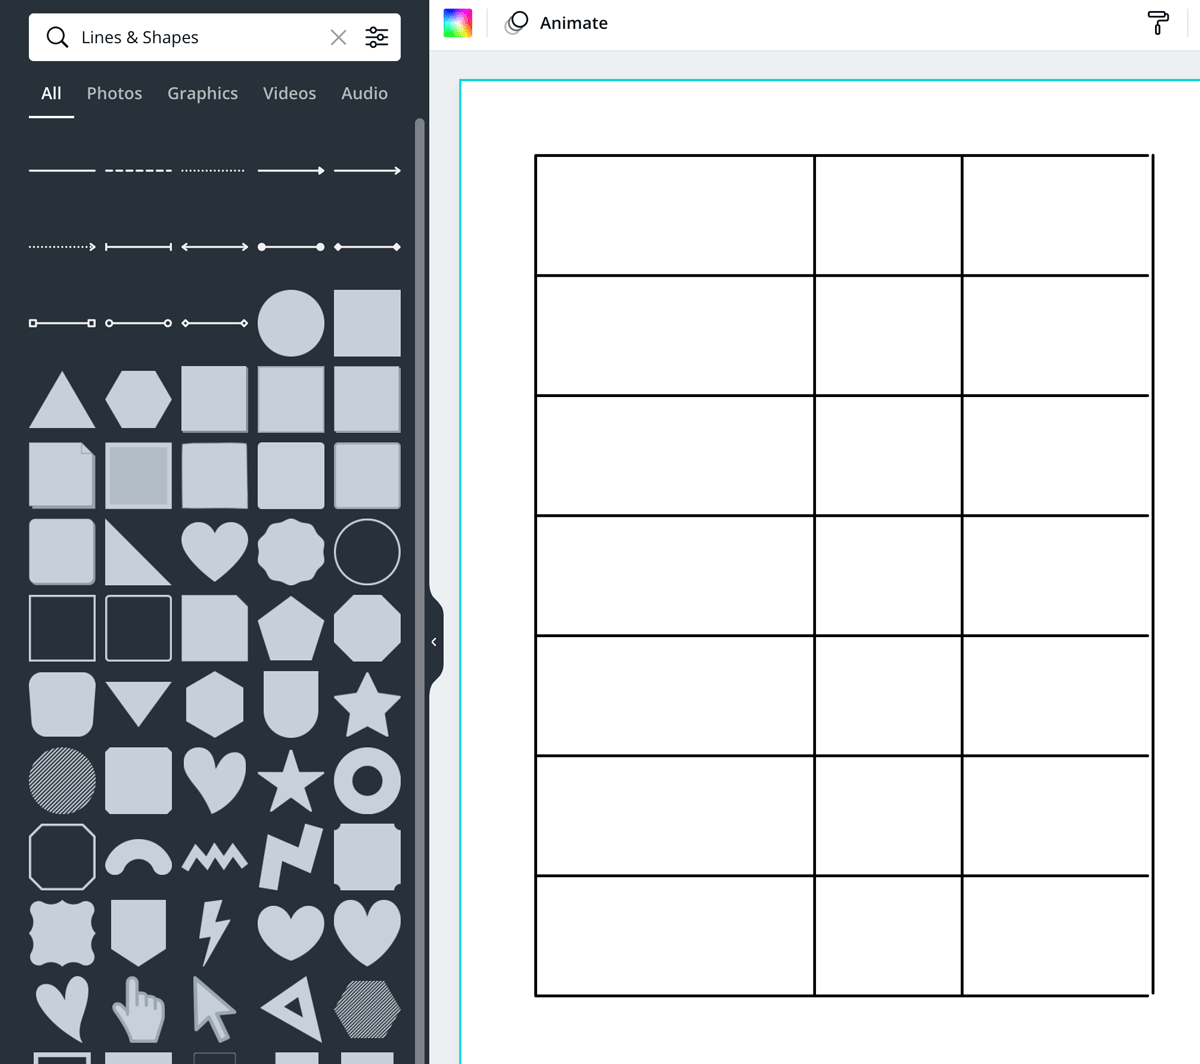
Step 2: Add a Grid
Canva simplifies the column creation process by offering a grid feature. Navigate to the "Elements" tab on the left-hand toolbar and choose "Grids." Select a grid layout that suits your design, and drag it onto the canvas.
Step 3: Customize Column Width
Click on the grid element to reveal customization options. Adjust the column width according to your preferences. This flexibility allows you to create equal-width columns or experiment with varying widths for a dynamic layout.
Step 4: Insert and Arrange Elements
Now that you have your columns in place, it's time to insert text, images, and other elements. Drag and drop your content into the designated columns. Use the layers panel to arrange elements within and between columns for optimal organization.
Step 5: Align and Distribute
Ensure a polished look by aligning and distributing elements within the columns. Canva provides alignment guides to assist you in achieving precision. Use the snap-to-grid feature to maintain consistency and balance throughout your design.
Step 6: Experiment with Color and Style
Enhance the visual appeal of your columns by experimenting with color and style. Customize backgrounds, fonts, and element styles to create a cohesive and aesthetically pleasing design. Bold text or use contrasting colors to draw attention to key elements.
Tips for Column Design in Canva
- Consistency is Key: Maintain consistent column widths and spacing for a professional and organized appearance.
- Whitespace Matters: Embrace whitespace between columns to avoid clutter and improve readability.
Conclusion
Creating columns in Canva opens up a world of design possibilities. With a well-organized layout, your content becomes more engaging and impactful. Experiment with different column setups and unleash your creativity to transform ordinary designs into visually stunning masterpieces.
Also Read This: How to Find Purchased Gigs on Fiverr
Utilizing Grids and Guides
Take your Canva designs to the next level by harnessing the power of grids and guides. These essential tools provide structure, alignment, and precision, ensuring your creations are visually cohesive and polished. Here's a comprehensive guide on how to effectively use grids and guides in Canva:
The Role of Grids
Canva's grids serve as a foundation for organizing content and maintaining a consistent layout. Access the grids feature from the "Elements" tab and choose from a variety of grid styles. Opt for a grid that complements your design, whether it's a simple 2x2 grid or a more intricate layout.
Aligning Elements with Precision
Activate the alignment guides to achieve pixel-perfect precision in your designs. As you drag and position elements, the alignment guides will snap them into place, ensuring seamless alignment within your chosen grid. This feature is particularly useful for maintaining a clean and organized look.
Customizing Grid Spacing
Tailor the grid spacing to suit the specific requirements of your design. Canva allows you to adjust the spacing between gridlines, providing flexibility for different design styles. Experiment with various spacing options to find the perfect balance for your composition.
Integrating Guides for Layout Precision
Guides act as additional markers for precise layout control. To add guides, simply click and drag from the rulers located on the top and left sides of the canvas. Guides help you align elements both horizontally and vertically, contributing to a well-structured and visually appealing design.
Creating Tables for Data Organization
For designs involving data or information tables, utilize Canva's table feature. Insert a table from the "Elements" tab and customize the number of rows and columns. Tables help you present information in a neat and organized manner, enhancing clarity and readability.
Best Practices for Using Grids and Guides
- Consistent Alignment: Ensure that elements align consistently with the grid for a polished and professional look.
- Balance and Symmetry: Use grids and guides to achieve balance and symmetry in your designs, creating a harmonious visual impact.
Conclusion
Grids and guides are indispensable tools in the Canva designer's toolkit. By mastering their use, you gain the ability to create designs that are not only aesthetically pleasing but also well-organized and visually impactful. Elevate your design game by incorporating these essential elements into your Canva workflow.
Also Read This: How Much Do You Earn from Fiverr?
Optimizing Text and Image Placement
Strategic placement of text and images is crucial in creating visually appealing and effective designs in Canva. In this guide, we'll explore techniques to optimize the placement of text and images for maximum impact:
Understanding Visual Hierarchy
Establish a clear visual hierarchy by determining the importance of different elements in your design. Use larger fonts, bold text, or vibrant colors for key messages, guiding the viewer's attention to the most significant information. This ensures that your message is communicated effectively.
Utilizing Alignment for Clean Designs
Aligning text and images creates a sense of order and professionalism in your designs. Canva's alignment guides make it easy to align elements horizontally and vertically. Experiment with left, center, or right alignment based on your design's aesthetic and the content you're presenting.
Text Placement Tips
- Balance Text Density: Distribute text evenly throughout the design to avoid overcrowding in one area. This helps maintain a harmonious visual balance.
- Consider Line Spacing: Adjust the line spacing to improve readability. A well-spaced layout contributes to a more engaging and polished appearance.
Image Placement Techniques
When incorporating images, pay attention to their placement for an aesthetically pleasing result. Canva's drag-and-drop functionality makes it easy to position images within your design. Consider these techniques:
- Overlay Images: Overlaying images can add depth and creativity to your design. Experiment with transparency to blend images seamlessly into the background.
- Use Grids for Image Arrangement: Align images within the grid you've set up for your design to maintain a structured layout.
Creating Captivating Headings
Headings play a crucial role in capturing attention. Experiment with font styles, sizes, and colors to create visually striking headings. Employ bold or italic text for emphasis, ensuring that your headings stand out amidst other design elements.
Consistency Across Multiple Elements
Maintain consistency in text and image placement across multiple elements within your design. Consistency fosters a cohesive and professional appearance, enhancing the overall impact of your visual content.
Conclusion
Optimizing text and image placement in Canva is a blend of creativity and strategic thinking. By understanding visual hierarchy, leveraging alignment tools, and experimenting with various techniques, you can elevate your designs to new heights. Keep these tips in mind as you craft visually appealing and engaging content for your audience.
Also Read This: “Is No Longer Available on Fiverr: Understanding the Changes and What It Means for Freelancers”
Adding and Customizing Elements
Transform your Canva designs into visually captivating masterpieces by strategically adding and customizing elements. Whether it's icons, illustrations, or shapes, Canva offers a diverse range of elements to enhance your creations. Here's a comprehensive guide on effectively incorporating and customizing elements in Canva:
Exploring the Elements Tab
The "Elements" tab, located in the left-hand toolbar, is your gateway to a vast collection of design elements. From icons and illustrations to shapes and lines, explore the variety of options available to complement your design theme.
Adding Icons and Illustrations
Icons and illustrations can add flair and personality to your designs. Use the search bar in the "Elements" tab to find relevant icons or illustrations. Once selected, simply drag and drop them onto your canvas. Resize and reposition as needed to integrate them seamlessly into your design.
Enhancing with Shapes and Lines
Shapes and lines are versatile elements that can be used to create borders, dividers, or to highlight specific areas in your design. Canva provides a wide array of shapes and lines in different styles. Experiment with shapes to frame your content or use lines to guide the viewer's attention.
Customizing Colors and Styles
After adding elements, it's time to customize them to match your design aesthetic. Click on an element to reveal customization options. Adjust colors, transparency, and styles to ensure cohesion with the overall theme. Consistent customization enhances the professional look of your design.
Layering and Arrangement
Utilize Canva's layers panel to control the arrangement of elements. Arrange elements forward or backward to create depth and hierarchy. Layering allows you to fine-tune the positioning of each element, ensuring a harmonious composition.
Tables for Organized Information
When presenting organized information, leverage Canva's table feature. Insert a table from the "Elements" tab, and customize the number of rows and columns. Tables provide a structured format for presenting data, making it easy for viewers to comprehend information at a glance.
Utilizing the Grouping Feature
Grouping elements is a handy feature in Canva, especially when working with complex designs. Select multiple elements, right-click, and choose the "Group" option. This allows you to move and manipulate multiple elements as a single unit, simplifying the editing process.
Conclusion
Adding and customizing elements in Canva empowers you to infuse creativity and personality into your designs. By exploring the diverse range of elements, customizing their appearance, and strategically arranging them, you can create visually stunning and engaging content that resonates with your audience.
Also Read This: Do You Tip on Fiverr? Insights from Reddit
Collaboration and Sharing Tips
Unlock the full potential of Canva by exploring collaborative features and optimizing sharing options. Whether you're working with a team or sharing your designs with clients, Canva's collaboration tools ensure a seamless and efficient workflow. Here's a guide to making the most of collaboration and sharing in Canva:
Invite Team Members
Collaboration in Canva begins by inviting team members to join your project. Click on the "Share" button in the top right corner, enter the email addresses of your team members, and assign appropriate roles such as "Editor" or "Viewer." This allows for real-time collaboration on the same design.
Real-Time Editing and Comments
Enjoy the benefits of real-time collaboration by editing designs simultaneously with your team. Changes made by one team member are instantly reflected for others. Use the comments feature to provide feedback or communicate within the design canvas, fostering a collaborative environment.
Version History
Canva's version history feature ensures that you can track changes made to a design over time. If needed, revert to previous versions or review the evolution of the design. This is particularly useful when multiple collaborators are contributing to a project.
Customize Sharing Settings
When it comes to sharing your designs, customize the sharing settings to control who can view or edit your work. Decide whether you want to allow public access, restrict access to specific individuals, or keep the design private. These settings provide flexibility based on your collaboration needs.
Download and Print Options
For offline sharing or printing, utilize Canva's download options. Click on the download button to choose from various file formats, including PDF, JPEG, or PNG. This ensures that your designs can be easily shared across different platforms or printed for physical distribution.
Presenting and Embedding Designs
Enhance your collaboration efforts by presenting your designs directly from Canva. Use the "Present" option to create a slideshow, making it convenient for team meetings or client presentations. Additionally, embed designs on websites or share links for seamless access.
Sharing Templates for Consistency
When collaborating on repetitive projects, share templates with your team to maintain consistency in design elements. This is particularly beneficial for branding materials or campaigns where a unified look and feel are essential.
Collaboration on Mobile Devices
Extend collaboration beyond desktops by utilizing Canva's mobile app. Stay connected with your team and make edits on the go. The mobile app ensures flexibility and accessibility, allowing collaboration anytime, anywhere.
Conclusion
Collaboration and sharing in Canva redefine the design process, fostering teamwork and efficient communication. By leveraging the collaborative features, customizing sharing settings, and exploring diverse sharing options, you can streamline your workflow and produce high-quality designs with ease.
Also Read This: Picture Perfect Blending: How to Blend Two Photos in Canva effortlessly
FAQ
Explore answers to frequently asked questions about organizing designs with columns in Canva:
Q: Can I add columns to any type of design in Canva?
A: Yes, you can add columns to various design types in Canva, including social media posts, presentations, posters, and more. The process may slightly vary, but the general principle of creating columns remains applicable across different designs.
Q: How do I adjust the width of columns in Canva?
A: To adjust the width of columns, use the grid feature available in Canva. After adding a grid to your design, click on it to reveal customization options. Here, you can adjust the column width to your preference, creating a layout that suits your design needs.
Q: Can I align text and images within the columns?
A: Absolutely. Canva provides alignment guides and tools to help you align text and images precisely within the columns. Use the drag-and-drop functionality along with the alignment options to achieve a clean and organized layout.
Q: Is it possible to customize the color and style of columns in Canva?
A: While Canva doesn't offer direct customization options for columns, you can create the illusion of custom-colored columns by working with shapes or background elements. Customize these elements with the desired colors and arrange them to create visually appealing columns.
Q: Can I collaborate with team members on a design with columns?
A: Certainly. Canva's collaboration features allow real-time editing and commenting. You can invite team members to collaborate on a design with columns, ensuring seamless teamwork and efficient project completion.
Q: Are there any best practices for creating columns in Canva?
A: Yes, maintaining consistency in column width, utilizing alignment guides, and experimenting with color and style for text and images are essential best practices. Also, consider the overall visual hierarchy of your design to ensure a balanced and appealing composition.
Q: Can I download and share designs with columns in different file formats?
A: Absolutely. Canva provides download options for various file formats, including PDF, JPEG, and PNG. You can also customize sharing settings to control access and collaborate effectively with others.
Q: How can I present designs with columns in a slideshow?
A: Utilize Canva's "Present" option to create a slideshow of your designs. This feature is ideal for team meetings or client presentations, allowing you to showcase designs with columns in a dynamic and engaging format.
Conclusion
Embark on a design journey where organization meets creativity with Canva's powerful features. In this guide, we've explored the intricacies of organizing your designs with columns, understanding Canva's interface, utilizing grids and guides, and optimizing text and image placement. We've also delved into the art of adding and customizing elements, collaborating effectively with team members, and sharing your designs seamlessly.
As you navigate through the diverse features of Canva, remember that the key to impactful designs lies in a harmonious blend of structure and creativity. From aligning elements with precision to experimenting with color and style, each step contributes to the visual appeal of your creations.
Whether you're a solo designer or part of a collaborative team, Canva empowers you to bring your ideas to life effortlessly. The ability to customize, collaborate in real-time, and share designs across various platforms ensures a versatile and efficient design workflow.
By mastering the techniques outlined in this guide, you're well-equipped to create visually stunning and organized designs that captivate your audience. Embrace the endless possibilities within Canva, and let your creativity flourish in the world of design.
Start organizing your designs with ease, crafting visually appealing layouts that leave a lasting impression. Elevate your design game with Canva's intuitive tools and turn every project into a masterpiece.


