
Before we embark on the exciting journey of curving images in Canva, let's lay the foundation by understanding the basics of this versatile design platform. Whether you're a seasoned user or a newcomer, these fundamental elements will ensure a smooth and enjoyable creative process.
1. Interface Overview
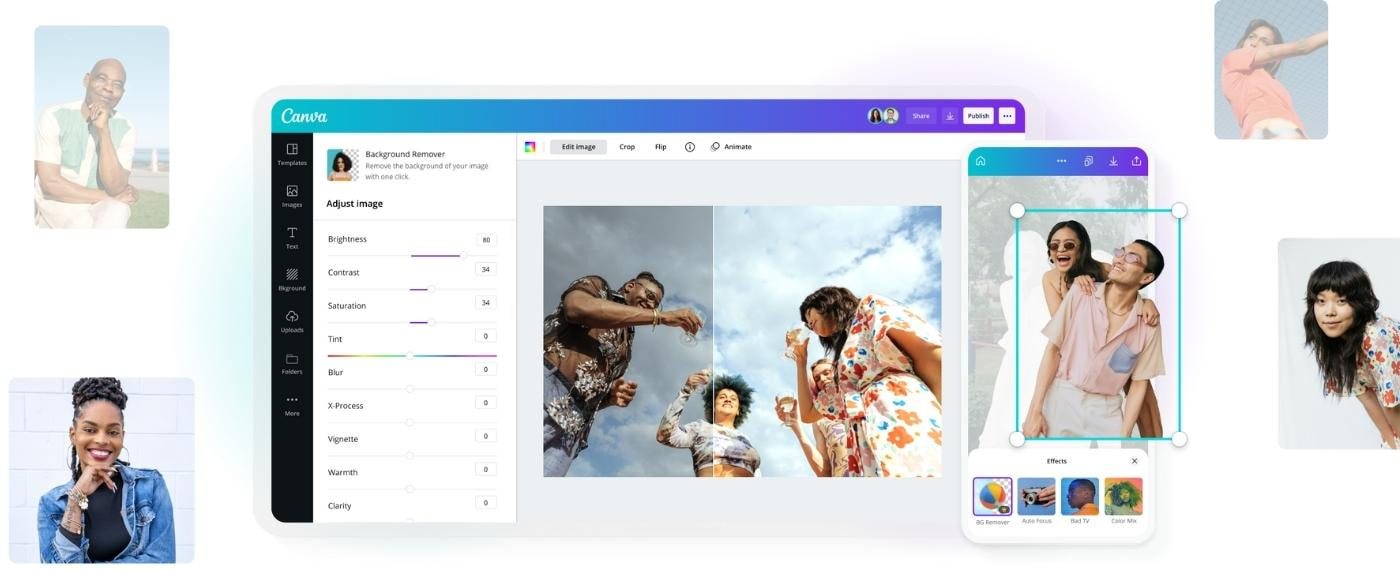
Canva's user-friendly interface is designed to make graphic design accessible to everyone. The dashboard is divided into key sections, including the toolbar, sidebar, and the main canvas area. Familiarize yourself with these components to navigate seamlessly.
2. Essential Tools
Explore Canva's toolkit, which includes a variety of design elements such as text, images, shapes, and more. Understanding how to use these tools will empower you to unleash your creativity and make the most of the platform.
3. Creating an Account
While Canva offers a free version, creating an account unlocks additional features and benefits. Sign up using your email or social media accounts to access a personalized workspace, save designs, and collaborate with others.
4. Templates and Layouts
Canva's extensive library of templates and layouts serves as a creative springboard for your projects. Choose from a wide range of designs tailored for social media, presentations, posters, and more. This saves time and ensures professional-looking results.
5. Uploading Images
For curving images, you'll need to upload the desired picture to Canva. Use the "Uploads" tab to seamlessly add your images to the platform. High-resolution images work best for achieving optimal results in the curving process.
6. Collaboration Features
Collaborate with teammates or clients by utilizing Canva's sharing and commenting features. This is especially beneficial when seeking feedback on your curved images or working on group projects.
7. Keyboard Shortcuts
Boost your efficiency by learning Canva's keyboard shortcuts. From duplicating elements to aligning objects, these shortcuts streamline your workflow and save valuable time.
8. Mobile App Integration
Take your creativity on the go with Canva's mobile app. Sync your projects seamlessly between devices, allowing you to work on your curved images whenever and wherever inspiration strikes.
Armed with these foundational insights, you're now ready to explore the intricacies of curving images in Canva. Let's dive into the "Curve" feature and elevate your design game!
Selecting the Right Image
Choosing the right image is a pivotal step in the process of curving an image in Canva. The visual impact of your curved image depends significantly on the quality and relevance of the chosen picture. Let's delve into the key considerations for selecting the perfect image.
1. High-Resolution Images
Opt for high-resolution images to ensure clarity and sharpness in the final curved result. Canva allows you to upload images in various formats, but for the best outcome, select files with a resolution of at least 300 DPI.
2. Visual Relevance
Consider the message or theme of your design when selecting an image. The visual content should align with the overall concept of your project, whether it's a social media post, presentation, or marketing material. This ensures coherence in your design elements.
3. Color Contrast
Pay attention to the color scheme of your image. A well-balanced color palette can enhance the impact of the curved effect. Ensure that the colors complement each other, and there is sufficient contrast for the curvature to stand out.
4. Subject Placement
Take into account the positioning of the main subject within the image. The "Curve" effect in Canva can accentuate certain areas, so choose images where the subject is well-centered or strategically placed to maximize the visual appeal.
5. Background Considerations
Consider the background of your image. Images with simple and uncluttered backgrounds work exceptionally well with the "Curve" effect, allowing the subject to take center stage. Avoid overly complex backgrounds that might distract from the curvature.
6. Image Composition
Evaluate the overall composition of the image. Images with strong compositions, interesting angles, and dynamic elements often yield stunning results when curved. Experiment with different compositions to see what works best for your design.
7. Consistency in Style
Maintain consistency in the style of your images, especially if you're curving multiple images for a cohesive project. Consistent styling creates a visually appealing narrative and reinforces your brand identity.
8. Experimentation
Don't be afraid to experiment with different images to discover the most impactful result. Canva provides a real-time preview of the "Curve" effect, allowing you to fine-tune your choices and find the perfect match for your design.
By carefully considering these factors, you set the stage for a successful image curving process in Canva. Now, let's dive into the platform and bring your selected image to life with the captivating "Curve" effect.
Also Read This: Top 10 Marketing Planners on Fiverr
Navigating Canva's Effects
Once you have selected the perfect image, the next step in curving an image in Canva involves navigating through the platform's effects section. Understanding how to access and utilize the "Curve" feature is crucial for achieving the desired visual impact. Let's explore the key steps and features in navigating Canva's effects.
1. Accessing Effects
Begin by opening your selected project in Canva. On the left sidebar, you'll find the "Effects" tab. Click on it to reveal a variety of effects that can be applied to your image. Scroll down until you locate the "Curve" option.
2. Identifying the "Curve" Feature
Within the "Effects" tab, the "Curve" feature is designed to add a dynamic and visually striking curvature to your images. This tool allows you to bend, warp, and reshape your chosen image, creating a unique and eye-catching visual effect.
3. Adjustment Options
Upon selecting the "Curve" effect, Canva provides a range of adjustment options. These include sliders for adjusting the intensity of the curvature, allowing you to control the degree of bending applied to your image. Experiment with these sliders to achieve the desired effect.
4. Real-Time Preview
Canva offers a real-time preview of the "Curve" effect as you make adjustments. This feature enables you to see the changes instantly, providing a responsive and user-friendly experience. Keep an eye on the preview to fine-tune the curvature according to your preferences.
5. Resetting Changes
If at any point you want to start over or undo the applied curvature, Canva includes a convenient "Reset" option. This allows you to revert to the original image and make adjustments from the beginning, ensuring complete control over the curving process.
6. Layering Effects
Explore the possibility of layering effects in Canva. Combining the "Curve" effect with other filters or adjustments can result in even more visually striking outcomes. Experimentation with different combinations adds depth and creativity to your design.
7. Saving Your Progress
Ensure to save your work periodically to preserve your progress. Canva provides an autosave feature, but manually saving your project ensures that you have a snapshot of each stage in case you want to revisit or make further modifications.
By mastering the navigation of Canva's effects, especially the powerful "Curve" feature, you're well on your way to transforming your chosen image into a visually captivating masterpiece. Now, let's move on to the step-by-step tutorial to guide you through the actual process of curving your image in Canva.
Also Read This: Does Fiverr Take Out Your Money?
Step-by-Step Tutorial
Embark on the exciting journey of curving your image in Canva with this step-by-step tutorial. Follow these straightforward instructions to add a dynamic and eye-catching curvature to your selected image.
1. Open Your Project
Start by opening your Canva project containing the image you want to curve. If you haven't created a project yet, you can do so by selecting the appropriate template or dimensions for your design.
2. Access the "Effects" Tab
On the left sidebar, locate and click on the "Effects" tab. This will reveal a list of available effects that can be applied to your image. Scroll down until you find the "Curve" option.
3. Choose the "Curve" Effect
Click on the "Curve" effect to apply it to your image. Instantly, you'll see a set of adjustment options appear, allowing you to customize the curvature according to your preferences.
4. Adjust the Intensity
Experiment with the intensity sliders to control the degree of bending applied to your image. Drag the sliders left or right to increase or decrease the curvature. The real-time preview will showcase the changes as you make adjustments.
5. Fine-Tune Your Design
Take advantage of the real-time preview to fine-tune the curvature until you achieve the desired visual effect. Consider the overall composition and balance of your design as you make adjustments.
6. Combine with Other Effects
For added creativity, explore combining the "Curve" effect with other filters or adjustments available in the "Effects" tab. Layering effects can result in unique and visually stunning outcomes, adding depth to your design.
7. Save Your Curved Image
Once satisfied with the curvature and overall design, don't forget to save your work. Click on the "File" menu and select "Save" to preserve your project. This ensures that you have the curved image ready for use in your various online platforms.
8. Export and Share
Export your curved image in the desired format (JPEG, PNG, etc.) and share it across your social media, website, or any other platforms. The curved effect will undoubtedly elevate the visual appeal of your content and leave a lasting impression on your audience.
With these simple and effective steps, you've successfully curved an image in Canva. Feel free to revisit this tutorial whenever you want to add a unique touch to your visuals. Now, let's explore some advanced tips and tricks to take your design skills to the next level.
Also Read This: How to Make Money on Fiverr Without Any Skill
Advanced Tips and Tricks
Congratulations on mastering the basics of curving images in Canva! Now, let's delve into some advanced tips and tricks to further enhance your design skills and unlock the full creative potential of the "Curve" effect.
1. Layering Multiple Curves
Take your design to the next level by experimenting with multiple instances of the "Curve" effect. Apply different degrees of curvature to various elements within your image to create a layered and dynamic visual impact.
2. Blending Modes
Explore the blending modes available in Canva to seamlessly integrate your curved image with the background or other design elements. Adjusting blending modes can add depth and sophistication to your visual composition.
3. Gradient Overlay
Enhance the aesthetics of your curved image by adding a gradient overlay. Use subtle gradients to create a smooth transition between colors, adding a touch of elegance and professionalism to your design.
4. Custom Shapes and Elements
Incorporate custom shapes or design elements into your curved images. Experiment with overlays, frames, or borders to add intricate details and further customize the overall look of your design.
5. Text Integration
Integrate text seamlessly with your curved image. Experiment with font styles, sizes, and placements to create visually engaging text elements that complement the curvature of your image. Bold or italicize key words for emphasis.
6. Animation Effects
If you're creating content for digital platforms, explore Canva's animation features. Apply subtle animation effects to your curved image, such as a gentle sway or rotation, to capture and maintain viewer attention.
7. Background Blur
Add a professional touch to your curved image by applying a background blur. This technique draws focus to the curved elements, creating a sense of depth and dimension in your design.
8. Collaboration and Feedback
Engage in collaboration by sharing your project with team members or peers. Collect feedback on your curved image, and use collaborative tools within Canva to refine and improve your design based on valuable input.
By incorporating these advanced tips and tricks, you'll elevate your design capabilities and create visually stunning curved images that stand out. Feel free to experiment, push your creative boundaries, and enjoy the process of crafting unique and captivating visuals in Canva.
Also Read This: How Good is Fiverr: A Comprehensive Review
FAQ
Explore the frequently asked questions to address any queries or concerns you may have regarding the process of curving images in Canva.
1. What types of images work best for the "Curve" effect?
Answer: High-resolution images with a clear subject and uncluttered background work best for the "Curve" effect. Ensure your chosen image aligns with the overall theme of your design.
2. Can I adjust the intensity of the curvature?
Answer: Absolutely! Canva provides sliders that allow you to adjust the intensity of the curvature. Experiment with these sliders to find the perfect balance for your design.
3. Is it possible to undo the applied curvature?
Answer: Yes, Canva includes a convenient "Reset" option. If at any point you want to start over or undo the applied curvature, simply click "Reset" to revert to the original image.
4. Can I combine the "Curve" effect with other filters?
Answer: Certainly! Experiment with combining the "Curve" effect with other filters or adjustments available in the "Effects" tab. Layering effects can result in unique and visually stunning outcomes.
5. How do I save my curved image?
Answer: To save your curved image, click on the "File" menu and select "Save." Canva also has an autosave feature, but manual saving ensures you have a snapshot of each stage of your design.
6. Can I collaborate with others on a curved image project?
Answer: Yes! Canva offers collaboration features, allowing you to share your project with team members or peers. Collect feedback and use collaborative tools to refine and improve your curved image.
7. Are there any recommended keyboard shortcuts for efficiency?
Answer: Boost your efficiency by learning Canva's keyboard shortcuts. These shortcuts cover various actions, from duplicating elements to aligning objects, streamlining your workflow and saving valuable time.
8. How can I export and share my curved image?
Answer: After finalizing your curved image, click on the "File" menu, select "Export," and choose your desired format (JPEG, PNG, etc.). Share your curved image across social media, websites, or any other platforms to showcase your enhanced visual content.
Feel free to refer to this FAQ section for guidance on curving images in Canva. If you have additional questions, don't hesitate to explore Canva's comprehensive support resources or community forums.
Also Read This: Can You Get Paid with PayPal Through Fiverr?
Showcasing Examples
Get inspired by real-world examples that demonstrate the transformative power of curving images in Canva. These showcased examples highlight the versatility and creative potential of this technique across various content types.
1. Social Media Graphics
Example: Imagine a social media post with a curved image of a product, seamlessly blending with the brand's color palette. The curvature not only adds visual interest but also directs attention to the key features of the product, making the post more engaging.
2. Presentation Slides
Example: In a business presentation, a curved image of a corporate logo or key statistics can serve as a dynamic focal point. The curvature creates a modern and polished look, elevating the overall professionalism of the slides.
3. Blog Featured Images
Example: Enhance your blog's visual appeal with a featured image that incorporates the "Curve" effect. A curved image at the top of your blog post not only captures attention but also sets the tone for a visually immersive reading experience.
4. Event Flyers and Posters
Example: Designing an event flyer or poster? Consider curving images of performers, venue snapshots, or event highlights. The curvature adds a touch of creativity and modernity, making your promotional materials stand out.
5. Personal Branding Materials
Example: For personal branding, use the "Curve" effect to enhance your professional headshot or logo. The curvature adds a unique touch, creating a memorable visual representation that reflects your individuality or brand identity.
6. Product Packaging Design
Example: Curving images on product packaging can elevate the overall aesthetics. Imagine a curved image of a delicious dish on a food product label. The curvature not only adds a contemporary feel but also emphasizes the quality of the product.
7. Educational Materials
Example: Teachers and educators can leverage the "Curve" effect in educational materials. A curved image in a presentation or learning resource can capture students' attention, making the material more visually appealing and engaging.
8. Website Banners and Headers
Example: Curving images in website banners or headers can enhance the user experience. Whether it's showcasing a product, service, or the essence of your brand, the curved effect creates a captivating visual element that draws visitors in.
These examples illustrate the diverse applications of curving images in Canva, showcasing how this technique can be a game-changer for your visual content. Feel free to draw inspiration from these examples as you incorporate the "Curve" effect into your own creative projects.
Also Read This: How to Change Username in Fiverr
Benefits of Curving Images
Discover the myriad advantages of incorporating the "Curve" effect into your design workflow in Canva. This simple yet powerful technique offers a range of benefits that can significantly enhance the visual appeal and impact of your images across various digital platforms.
1. Visual Distinction
Curving images instantly sets them apart from standard, flat visuals. The dynamic curvature captures attention, making your content visually distinctive and memorable.
2. Creative Expression
The "Curve" effect serves as a tool for creative expression. It allows you to infuse a sense of movement and style into your images, enabling you to convey your message in a more dynamic and engaging manner.
3. Emphasis on Key Elements
By strategically applying curvature, you can emphasize specific elements within your image. Whether highlighting a product, logo, or key feature, the curvature directs attention and guides the viewer's focus.
4. Modern Aesthetics
Curved images exude a modern and contemporary aesthetic. This visual style is particularly appealing in the digital landscape, contributing to a fresh and up-to-date look for your content.
5. Enhanced Branding
For businesses and personal brands, curving images can be a powerful branding tool. It adds a unique and recognizable visual element that contributes to a cohesive and professional brand identity.
6. Increased Engagement
Curved images are inherently more engaging. The dynamic and eye-catching nature of the curvature draws viewers in, encouraging increased interaction and engagement with your visual content.
7. Versatility Across Platforms
The benefits of curving images extend across various digital platforms. Whether used in social media graphics, presentations, websites, or marketing materials, the curved effect adapts seamlessly to diverse content types.
8. Elevated Storytelling
Curved images contribute to enhanced visual storytelling. The curvature adds a layer of narrative depth, allowing you to convey a sense of movement, energy, or emotion within your visual narratives.
Unlock these benefits and more by incorporating the "Curve" effect into your design toolkit. Whether you're a content creator, marketer, or enthusiast, embracing the advantages of curved images in Canva can elevate the impact of your visual content in exciting and innovative ways.
Conclusion
Congratulations on exploring the art of curving images in Canva! In conclusion, this blog post has guided you through the fundamentals, techniques, and creative possibilities of using the "Curve" effect to achieve a unique and captivating look for your images.
From understanding Canva's basics to selecting the right images and navigating through effects, you've gained valuable insights into the process. The step-by-step tutorial and advanced tips have empowered you to take your design skills to new heights, allowing for the creation of visually stunning curved images.
By showcasing real-world examples, you've witnessed the versatility of this technique across different content types. Whether it's social media graphics, presentations, or personal branding materials, the "Curve" effect proves to be a powerful tool for enhancing visual storytelling and creating a lasting impact.
The FAQ section has addressed common queries, providing clarity on various aspects of curving images in Canva. Additionally, the benefits outlined in the previous section highlight the numerous advantages this technique brings, from increased engagement to elevated branding and modern aesthetics.
As you embark on your journey of curving images in Canva, remember to embrace experimentation and creativity. The platform's user-friendly interface, coupled with the powerful "Curve" effect, offers endless possibilities for expressing your unique style and vision.
Feel free to refer back to this comprehensive guide whenever you need a refresher or seek inspiration. The world of design is dynamic and ever-evolving, and with your newfound knowledge, you're well-equipped to continue crafting visually stunning and impactful content with the help of Canva's "Curve" effect.
Thank you for joining us on this creative exploration, and may your future design endeavors be filled with innovation, expression, and the unique allure of curved images!


