In today's gig economy, platforms like Fiverr have become popular for freelancers to offer their services. However, transferring funds from Fiverr to a payment method that suits you is crucial for accessing your earnings. Payoneer is one such payment service that enables you to easily manage and transfer your freelance income. In this blog post, we’ll explore how to smoothly transfer your balance from Fiverr to Payoneer and discuss the advantages of using these platforms together.
Understanding Fiverr and Payoneer

Before diving into the transfer process, it's essential to understand what Fiverr and Payoneer are and how they work. They both play a significant role in the freelance economy, offering unique benefits to freelancers and businesses alike.
What is Fiverr?
Fiverr is an online marketplace that connects freelancers with clients who need various services, ranging from graphic design and writing to digital marketing and video editing. Here are some key features of Fiverr:
- Service Diversity: At Fiverr, you can find services from almost every industry, making it a versatile platform.
- Ease of Use: The user-friendly platform allows sellers to create service listings, known as "gigs," effortlessly.
- Global Reach: Fiverr allows freelancers to connect with clients from all over the world, enhancing potential earnings.
What is Payoneer?
Payoneer is a financial services company that offers online money transfer and digital payment tools. It’s particularly favored by freelancers and businesses that operate globally. Here are some benefits of using Payoneer:
- Global Payment Solutions: Payoneer allows you to receive payments from clients worldwide in various currencies.
- Prepaid MasterCard: With a Payoneer card, you can withdraw cash from ATMs or shop online, making your earnings accessible.
- Currency Conversion: Payoneer provides favorable currency exchange rates, allowing for cost-effective transactions.
In summary, understanding these platforms will help you make informed decisions about managing your freelance earnings effectively.
Also Read This: How to Create a Fiverr Gig on Mobile
Setting Up Your Payoneer Account

Setting up your Payoneer account is a straightforward process that opens the door to seamless transactions between Fiverr and your bank account. Let’s walk through the steps together!
- Visit the Payoneer Website: First things first, head over to Payoneer's official site. Look for the “Sign Up” button, usually found right on the homepage.
- Choose the Right Account Type: You’ll be prompted to select what kind of account you need. As a Fiverr freelancer, choose a “Freelancer/Entrepreneur” account.
- Fill in Your Details: You'll need to provide some personal information like your name, email, and address. Make sure everything matches the details on your government-issued ID for smoother verification later.
- Account Verification: After filling out your information, you’ll receive an email from Payoneer. Follow the instructions to verify your email and complete identity verification with the required documents. This is super important for your account's security.
- Set Up Payment Methods: Once verified, you’ll have the option to set up various payment methods. Choose the ones that suit your needs best, like bank transfers or receiving payments from different platforms.
And voilà! You’re now ready to explore your Payoneer account. Just remember to keep your login details secure, and you’ll be all set for smooth transactions!
Also Read This: Promoting Freelance Services Effectively
Linking Your Fiverr Account to Payoneer

Once your Payoneer account is up and running, the next step is to link it to your Fiverr account. This connection allows you to withdraw your earnings directly to Payoneer. Ready? Let’s dive into it!
- Log into Your Fiverr Account: Start by logging into your Fiverr account. If you don’t have one yet, it’s time to sign up!
- Access the Earnings Section: Click on your profile picture in the top right corner and select “Earnings” from the drop-down menu. This is where the magic happens!
- Select Withdrawal Method: In the Earnings section, you’ll see an option to set your withdrawal method. Click on “Withdraw Funds,” and you’ll be prompted to choose Payoneer.
- Connect to Payoneer: If you’ve already set up your Payoneer account, click on “Connect to Payoneer.” You may have to log into your Payoneer account to authorize this connection. Don’t forget to allow Fiverr to access your Payoneer account!
- Confirm the Linking: After you authorize, follow any additional prompts to confirm the linking process. Once done, you should receive a confirmation message that your accounts are linked!
Linking your Fiverr account to Payoneer is a crucial step, and now you’re all set up to smoothly transfer your hard-earned money. Happy freelancing!
Also Read This: How to Activate a Disabled Fiverr Account
Steps to Transfer Your Balance from Fiverr to Payoneer

Transferring your hard-earned Fiverr balance to your Payoneer account is a straightforward process. Just follow these simple steps, and you’ll have it done in no time!
- Log into Your Fiverr Account: First, open your web browser and head over to the Fiverr website. Log in with your credentials to access your account dashboard.
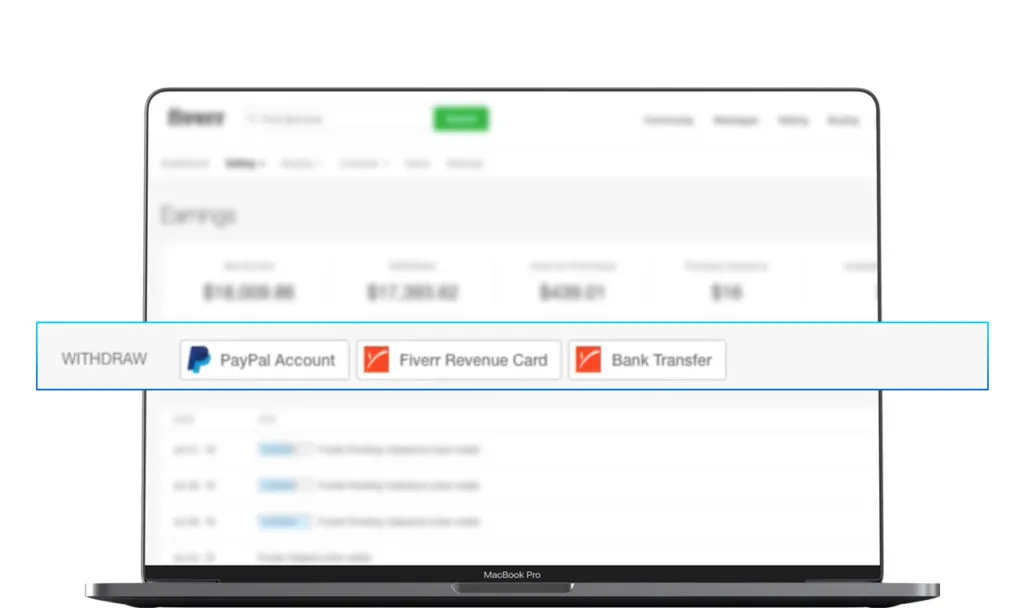
- Go to Your Earnings: Once logged in, navigate to the upper right corner of the screen. Hover over your profile picture, and click on “Earnings” from the dropdown menu. This will take you to the page where you see your available funds.
- Select Withdraw: You’ll notice your Fiverr balance displayed prominently on the earnings page. Look for the “Withdraw” button, usually located near your balance, and give it a click.
- Choose Payoneer as Your Withdrawal Method: A list of withdrawal methods will pop up. Select “Payoneer” from this list. If you haven’t linked your Payoneer account yet, you might need to set that up first.
- Enter the Amount: Now, specify the amount you want to transfer from your Fiverr balance to Payoneer. Make sure you are aware of any minimum withdrawal limits that Fiverr might have.
- Confirm the Transfer: Review the details of your transaction. Check the amount, your Payoneer account information, and any associated fees. If everything looks good, click on the “Confirm” button to complete the transfer.
And that’s it! It usually takes a short while for the funds to appear in your Payoneer account. You’re all set to use your earnings!
Also Read This: How to Edit Samples on Fiverr
Common Issues and Troubleshooting
Despite the simplicity of transferring funds from Fiverr to Payoneer, sometimes you might run into a snag. Here are some common issues you might experience and tips on how to solve them!
- Withdrawal Method Not Linked: If you don't see Payoneer as an option, ensure that your Payoneer account is properly linked to your Fiverr profile. Go to your settings and check the linked accounts section.
- Minimum Withdrawal Limits: Fiverr has a minimum withdrawal threshold. If your balance is below this amount, you won't be able to make a transfer. Always check the limits!
- Transaction Delays: Sometimes, withdrawals can take longer than expected. If it’s been more than a few hours and the funds are not in your Payoneer account, check your Fiverr account for any notifications regarding the transfer.
- Transaction Fees: Be aware that both Fiverr and Payoneer may deduct fees for the transfer. Make sure to account for this when planning withdrawals.
If you encounter any other issues, don't hesitate to reach out to Fiverr's or Payoneer's customer support. They can help resolve any problems you might face!
Also Read This: How Do I Get My Money from Fiverr?
7. Tips for a Smooth Transfer
Transferring your balance from Fiverr to Payoneer can seem a bit tricky at first, but with the right approach, it can be a breeze! Here are some handy tips to ensure a smooth transfer process:
- Verify Your Account: Make sure that both your Fiverr and Payoneer accounts are verified. This step is crucial, as it can prevent any delays during the transfer.
- Keep Funds Ready: Avoid initiating a transfer when your Fiverr balance is low. It’s always a good idea to wait until you have a comfortable amount to transfer, as some fees may apply.
- Check Transfer Limits: Familiarize yourself with Payoneer’s transfer limits and fees so you know what to expect. It’s best to plan your transfers accordingly.
- Allow Time for Processing: Remember that transfers can take some time. Fiverr states that it might take up to 3-5 business days for the funds to reflect in your Payoneer account post-transfer.
- Keep Communication Open: If you encounter issues, don’t hesitate to reach out to Fiverr or Payoneer support. They are there to help you navigate through any hiccups.
- Stay Up-to-Date: It’s good practice to keep an eye on both Fiverr and Payoneer’s announcement pages for any updates regarding policies or procedures that might affect your transfer.
By following these tips, you can ensure your transfer process is as seamless as possible!
8. Conclusion
In summary, transferring your balance from Fiverr to Payoneer doesn’t have to be a daunting task. It’s all about understanding the steps involved and being prepared! Start by ensuring that your accounts are verified and familiarize yourself with the process and any potential fees. Here’s a quick recap of what we’ve discussed:
- Verify both your Fiverr and Payoneer accounts.
- Check your Fiverr balance before initiating a transfer.
- Understand transfer limits and processing times.
- Utilize customer support if needed.
By keeping these points in mind, you can make more informed decisions and enjoy a hassle-free experience when transferring your earnings. Remember, with a little patience and preparation, you can manage your funds effectively and focus more on your projects on Fiverr. Happy transferring!


