
If you've ever found yourself in need of freelance services or looking to offer your own skills, then you've probably heard of Fiverr. It's a bustling online marketplace where buyers and sellers connect over creative services, ranging from graphic design to writing and everything in between. As a seller, you aim to compete in a crowded space, and one of the ways to streamline your business transactions is by using EST invoices.
Now, what’s an EST invoice, you ask? Simply put, it's a type of invoice owing to the Eastern Standard Time, and for those conducting business across different time zones, it becomes crucial to manage billing effectively. Using EST invoices on Fiverr allows you to keep clear records for your services while ensuring everything remains professional for your clients. Let’s dive into setting things up and make your Fiverr experience even more seamless!
Step 1: Setting Up Your Fiverr Account
Alright, so you've decided to jump onto Fiverr. That's great! But first things first: you need to set up your account properly. This is your gateway to the freelancing world, and getting it right from the start is essential.
Here’s how you can set up your Fiverr account efficiently:
- Visit the Fiverr website: Go to www.fiverr.com and click on the “Join” button.
- Sign up: You can choose to sign up using your email address, or connect through Facebook, Google, or Apple. Just pick the option that works best for you!
- Create a username: Choose a unique username that reflects your brand or the services you offer. This name will appear publicly, so pick something memorable.
- Set a strong password: Ensure your password is secure but also something you can remember. A strong password usually has a mix of letters, numbers, and special characters.
- Complete your profile: After signing up, fill in your profile details, including a professional profile picture, a compelling bio, and your skills. This information helps potential clients trust you.
- Add your services: Go ahead and create “gigs.” Gigs are your service listings, where you can specify what you offer, your pricing, and any extras.
Once you've gone through these steps, you’ll have a functional Fiverr account ready to go. Don’t forget to verify your email; it’s an essential part of the process!
In the next steps, we’ll cover how to set up your EST invoices once you start making sales on Fiverr. Stay tuned for more tips!
Also Read This: Can You Get Money Back from Fiverr?
Step 2: Creating Your Service Listing
Now that you've got a clear idea of the services you want to offer, it’s time to create your service listing on Fiverr. This is your opportunity to shine and let potential clients know what you bring to the table. Here’s a straightforward way to craft an engaging listing:
- Title: Keep it concise but descriptive. Make sure to highlight what makes your service unique.
- Description: This is where you can go into detail. Explain your service, your process, and what clients can expect. Don’t forget to use keywords related to your service to enhance visibility.
- Pricing: Set competitive prices. You can offer different packages (basic, standard, premium) to suit various budgets. Use Fiverr’s pricing tools for guidance.
- Requirements: Clearly state what you need from clients before starting the project. This might include details like branding guides, specific requests, or deadlines.
- Gallery: Visuals matter! Upload high-quality images or samples of your previous work. This helps build credibility and showcases your skills.
Once your listing is up, it’s crucial to keep it updated. Consider client feedback and tweak your offerings to align with evolving trends on the platform. Happy listing!
Also Read This: How to Pronounce Fiverr
Step 3: Understanding EST Invoices
In the world of freelancing, invoices serve as the official record of the services rendered and the payment requested. When you’re on Fiverr, understanding how EST (Electronic Service Transaction) invoices work is essential. Let’s break it down:
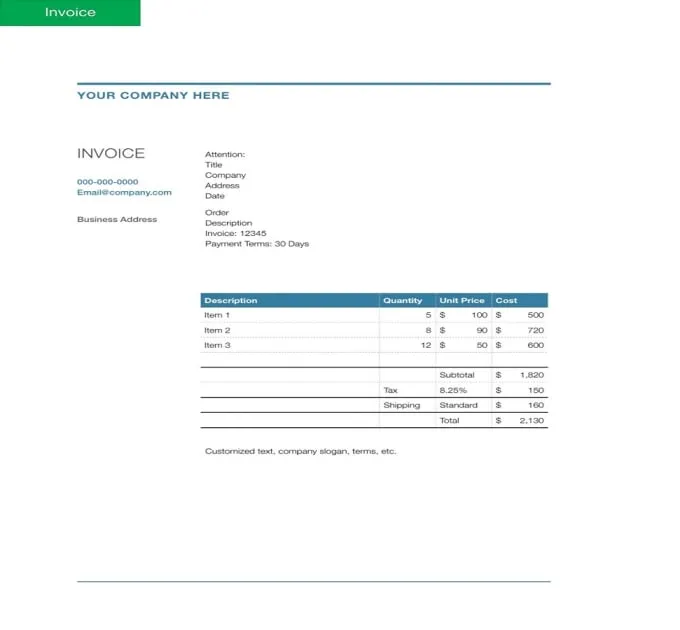
- What is an EST Invoice? An EST invoice is a digital invoice that documents the sale of services. It includes crucial information such as the service provided, date, payment amount, and your details as the seller.
- Importance: Sending EST invoices ensures that both you and your clients have a clear understanding of the transaction. It also provides necessary documentation for tax purposes.
- How to Create an EST Invoice on Fiverr:
- Access the 'Orders' section after a transaction is completed.
- Select the order you want to invoice.
- Use Fiverr’s in-built tools to generate an invoice automatically.
- Information Included: A typical EST invoice includes:
| Detail | Description |
|---|---|
| Invoice Number | Unique number for tracking |
| Date Issued | Date when services were provided |
| Service Description | What you provided |
| Amount Due | Total amount payable |
| Payment Methods | How payment can be made |
By understanding EST invoices, you can ensure smooth transactions and maintain good financial records for your freelance business. Happy invoicing!
Also Read This: How Much to Charge as a Freelance Copywriter
Step 4: How to Generate an EST Invoice
Generating an EST (Electronic Sales Tax) invoice on Fiverr is a straightforward process, especially when you're equipped with the right knowledge. Here's how to do it:
- Log in to Your Fiverr Account: First things first, head over to Fiverr.com and log into your account. Make sure you're using the account associated with the order for which you're generating the invoice.
- Access Your Orders: On the main dashboard, click on the "Orders" tab. This will take you to a page where you'll see all your current and past orders.
- Select the Specific Order: Find the order for which you want to create the EST invoice. Click on it to access the details.
- Locate the Invoice Option: Once you've accessed the order details, scroll down until you see the "Invoice" or "Generate Invoice" option. This is where the magic happens!
- Complete the Required Details: Fill in necessary details such as:
- Date of Issue
- Customer's Name
- Description of Services
- Total Amount (including taxes)
- Preview Your Invoice: Before finalizing, take a moment to preview what your invoice will look like. This is a crucial step; you want to ensure everything is accurate.
- Generate the Invoice: Once everything looks good, hit "Generate." Your EST invoice will be created and ready for use!
And voilà! You've successfully generated an EST invoice on Fiverr. Easy peasy, right?
Also Read This: How to Do Voiceover on Fiverr
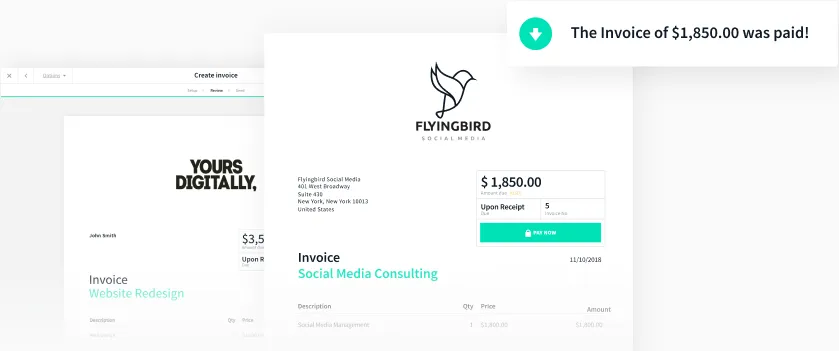
Step 5: Sending the EST Invoice to Your Client
Now that you've got your sleek EST invoice all set up, it's time to send it to your client! Here's how to do that smoothly:
- Open the Invoice: Navigate back to the invoice you just generated. You should find an option to view or download it.
- Download the Invoice: If there's a download option, click that to save the invoice as a PDF or image file. This is the format clients usually prefer.
- Go to the Message Section: Click on the "Messages" icon on Fiverr. This will show you the list of conversations you’ve had with clients.
- Select Your Client: Click on the conversation thread for the client you want to send the invoice to. If it's a new client, you can start a new conversation with them.
- Attach the Invoice: Look for the attachment icon (usually a paperclip). Click on that and upload the invoice file you just downloaded. Make sure to double-check that you've attached the correct document!
- Add a Personal Message: It’s always a good idea to include a courteous note along with your invoice. You might say something like, “Hi [Client's Name], here is the EST invoice for our recent project. Thank you for your business!” This adds a personal touch.
- Send the Message: Finally, hit "Send." Your client will receive the invoice directly through Fiverr, making it an efficient process.
And just like that, you’ve sent your EST invoice off into the world! Your client will appreciate the professionalism, and you can move on to your next gig with confidence.
Also Read This: Does Fiverr Music Promotion Work? Unveiling the Truth
7. Common Mistakes to Avoid When Sending EST Invoices
When you're navigating the world of freelancing on platforms like Fiverr, sending your EST (Electronic Service Transaction) invoices accurately is crucial. Here are some common pitfalls to steer clear of:
- Incorrect Client Information: Always double-check the client's name and email address. A small typo can lead to delays in payment.
- Poor Format: Your invoice should look professional. Avoid overly complicated layouts; stick to a clean, simple design.
- Missing Details: Ensure you include essential details like your business name, address, date, service description, amount due, and payment terms. Leaving out any of these can confuse your client.
- Unclear Payment Terms: Be explicit about payment deadlines and accepted methods (like PayPal, bank transfer, etc.). If it’s fuzzy, payments might come in late.
- Not Following Up: If you haven’t received payment after your due date, don’t hesitate to send a polite reminder. It’s easy for clients to overlook an invoice.
- Ignoring Local Regulations: Research any local tax or invoicing regulations. Not following these could lead to legal troubles.
By being mindful of these common mistakes, you can ensure that your invoicing process runs smoothly and that you get paid promptly for your hard work!
8. Conclusion: Best Practices for Sending Invoices on Fiverr
Sending invoices might seem like a daunting task, but with the right best practices, it can be a breeze! Here’s a handy checklist to help you send your invoices on Fiverr like a pro:
| Best Practice | Description |
|---|---|
| Use a Standard Template | Create a professional invoice template that includes your branding. This not only saves time but also reinforces your brand. |
| Be Transparent | Clearly outline the services rendered and the corresponding charges. Transparency builds trust and minimizes disputes. |
| Send Invoices Promptly | Don’t wait too long after delivering a service. The sooner you send the invoice, the sooner you’ll get paid! |
| Choose the Right Payment Method | Be flexible by offering various payment options, so clients can choose what’s most convenient for them. |
| Keep Records | Maintain copies of all invoices sent for your own record-keeping and for tax purposes. |
By following these best practices, you'll not only improve your invoicing efficiency but also enhance your professional reputation on Fiverr. Happy freelancing!


