
Getting started on Fiverr is a breeze! If you haven't already got an account, the first step is to create one. Just open the app, and you’ll see an option to register. You can choose to sign up using your email address, Google account, or even through your Facebook profile. How convenient is that?
Once you've selected your method, you’ll be prompted to provide a few details, like your name and a unique username. Make sure to pick something catchy but also professional because this will be your Fiverr identity. It’s always good to stand out in a sea of sellers!
If you already have an account, simply tap the "Log In" button. Enter your credentials—either your email and password or use your social media log-in options. Personally, I find the social media option to be a time-saver!
Your account is crucial because it will house all your gigs, past orders, messages, and reviews. So whether you’re a newbie or a returning seller, making sure you’re logged into your account correctly will pave the way for your Fiverr journey.
Step 3: Navigate to the Gigs Section

All set up? Great! Now it’s time to dive into the Gigs section. After logging into your account, look for the menu icon—usually represented by three horizontal lines—located in the top left or right corner of the app. Tap on it, and you’ll see various options. This is where the magic happens!
Once the menu expands, find and select “Selling”. You’ll be directed to a page where you can manage your gigs. Here’s a quick breakdown of what to do next:
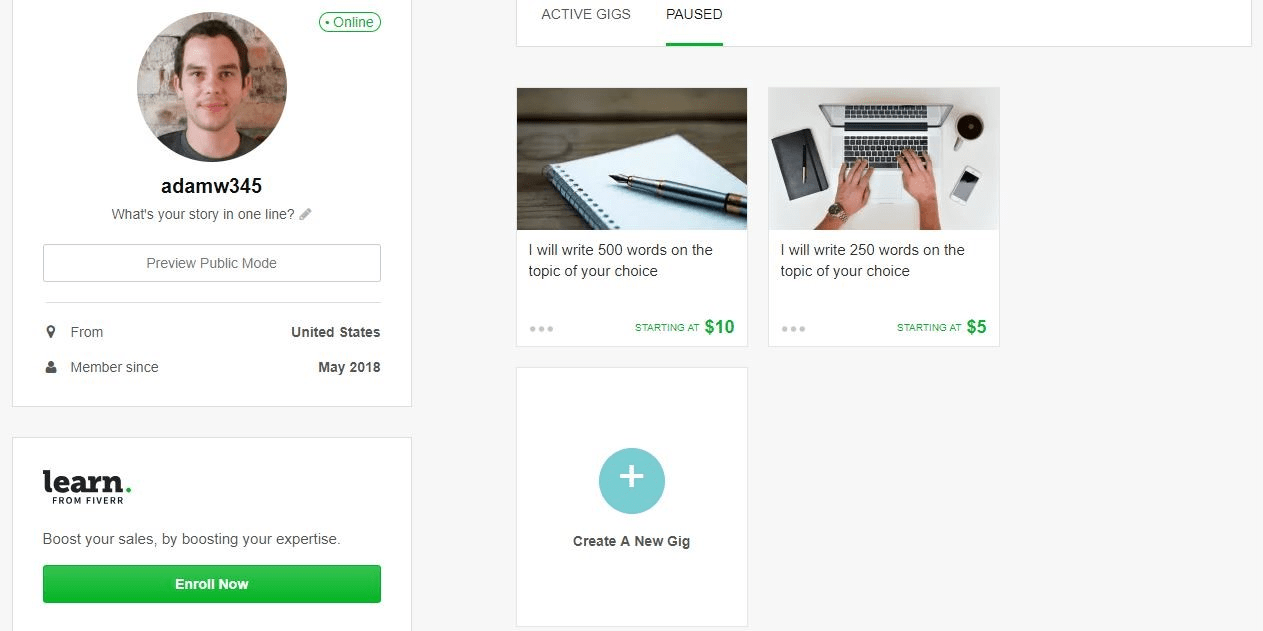
- Create New Gig: This is the option you’ll want to tap on to start your gig setup.
- Manage Gigs: If you’ve created gigs before and want to make adjustments, this area has you covered!
- Gig Analytics: Keep track of how your gigs are performing over time.
Navigating to the Gigs section is the gateway to bringing your skills and services to potential buyers. So, take a moment, browse around, and familiarize yourself with the options available to you. You’re one step closer to launching your Fiverr gig!
Also Read This: Do I Own My Fiverr Logo?
Step 4: Click on 'Create a New Gig'
Now that you've signed into the Fiverr mobile app and you’re all set to create your very own gig, it’s time to dive in! You’ll need to navigate to the main dashboard. From there, look for the little “menu” icon—usually located in the top left corner of your screen. It’s like opening a treasure chest filled with options!
Once the menu appears, scroll down until you find the option labeled “Selling.” Tap on it, and voilà—you’re now in the Selling section. Here’s where the real fun begins! To create your gig, find and click on the “Create a New Gig” button. It’s a friendly green button that shines like a beacon, inviting you to take the plunge.
Why is this step important? Well, creating a new gig is like setting the stage for your show. It’s your chance to showcase what you can offer and why buyers should choose you over someone else. So take a deep breath and click that button! You’re one step closer to sharing your talents with the world.
Before you click, make sure you're in a quiet environment where you can focus because getting your gig just right is crucial! Once you’ve clicked the button, get excited—your journey to becoming a Fiverr seller is just about to kick off!
Also Read This: What Freelance Writers Can Expect to Make
Step 5: Fill Out Your Gig Details
Alright, you’re now at the stage where you get to fill out the nitty-gritty details of your gig! Take this step seriously, as it’s all about what you’re offering and how you present it. First, Fiverr will prompt you to select a category. This tells potential buyers what area you specialize in, whether it’s graphic design, writing, or something unique and quirky!
Once you've picked your category, it's time to move on to your gig title. Here’s a tip: make it catchy yet descriptive. For example, instead of saying "I write," try something like, "I craft compelling blog posts that engage readers." See the difference? It's all about making a statement!
Next up is the description. This is your spotlight moment to shine! Describe what you offer, how it benefits buyers, and what makes you the best fit. Use bullet points or short paragraphs to make it easy to read. For instance:
- Professional experience in your field
- Quick turnaround times
- Unlimited revisions
Lastly, don’t forget to set your pricing structure and include any extras you might want to offer. This is your chance to get creative with how you package your services!
And that’s it! Once you’re satisfied with all the details, you’re one step closer to launching your gig into the Fiverr marketplace. Just hit that save button and get ready for the next thrilling step!
Also Read This: How to Create a Gig on Fiverr: A Step-by-Step Guide
Step 8: Upload Relevant Images or Videos
When it comes to posting your gig on Fiverr, visuals are everything! This is your chance to grab the attention of potential buyers, so you want to make sure your images and videos are top-notch. Here are some key points to remember as you prepare to upload your visuals:
- High Quality: Use images and videos that are clear and high resolution. Blurry or pixelated visuals can make your gig look unprofessional.
- Relevance: Make sure your visuals accurately represent the services you offer. If you're a graphic designer, showcase your best designs. If you're a writer, consider sharing screenshots of your work.
- Use Multiple Images: Fiverr allows you to upload several images. Use this feature to show different aspects of your work – perhaps a portfolio piece, a process shot, or even customer testimonials.
- Create an Engaging Video: Adding a video can boost your gig's visibility. Keep it short, around 30-60 seconds, and introduce yourself while explaining why buyers should choose your service.
Remember, the first impression matters. So take your time with this step! Once you're satisfied with your visuals, it’s time to move onto the next step.
Also Read This: Best Fiverr Sellers for Translation Services in 2024
Step 9: Preview Your Gig and Make Edits
Before you hit that “publish” button, it’s crucial to preview your gig. This step gives you the opportunity to see how everything looks, ensuring that your hard work shines through. Here’s how to do it:
- Review Content: Read through your title, description, and tags. Are they clear and concise? Do they properly reflect what you’re offering?
- Check Visuals: Look at the images and videos you uploaded. Do they appear correctly? Are they engaging and relevant?
- Look for Typos: Spelling and grammar mistakes can undermine your professionalism. Proofread everything one last time.
- Test Ad Formats: If you're offering packages, ensure each one is clear and that the prices reflect the value of what you’re providing.
If you notice anything that needs tweaking, now’s the time to make those edits. Once you’re satisfied with how your gig looks, it’s finally ready for the world to see! Hit that “Publish” button, and watch your Fiverr journey begin!
Also Read This: The Best Description Samples For A Data Entry Gig on Fiverr
Step 10: Publish Your Gig
Alright, you’ve made it to the final step of creating your gig on the Fiverr mobile app! This is where the magic happens, and you officially get to showcase your skills to the world. But before you hit that publish button, let’s go over a few important things to keep in mind.
First off, double-check all the information you’ve entered. Here’s a quick checklist for you:
- Title: Is it catchy and relevant?
- Description: Does it clearly explain what you offer?
- Specializations: Have you mentioned any specific skills or unique selling points?
- Pricing: Are your packages (Basic, Standard, Premium) clear and appropriate?
- Delivery Time: Is the timeframe realistic?
- Extras: Have you included any gig extras that can enhance your offer?
Once you’re satisfied with everything, just scroll down a bit and you’ll see the big Publish button. Go ahead and tap it! You’re officially live! 🎉
After your gig is published, you might want to take a moment to celebrate. But don’t get too comfortable just yet! Promotion is key. Share your gig on social media, tell your friends, and network within your niche to attract potential buyers. Remember, this is just the beginning of your Fiverr journey!
Also Read This: How to Charge Hourly on Fiverr: A Comprehensive Guide
Conclusion
Congratulations on successfully posting your gig on the Fiverr mobile app! It may seem like a daunting process at first, but now you can see how straightforward it really is. From selecting your category to publishing your gig, each step is designed to help you market your skills effectively.
Here's a quick recap of what we've covered:
| Steps | Key Points |
|---|---|
| Step 1: Choose Category | Select a relevant category that matches your skill. |
| Step 2: Details | Fill in all the necessary information about your offering. |
| Step 10: Publish! | Review everything and hit publish. |
As you embark on this adventure on Fiverr, keep in mind that patience and persistence are key. It might take time to get your first few orders, but with a well-crafted gig and some strategic promotion, you’ll be on your way to building a successful freelance career.
So, what are you waiting for? Get out there, create your gig, and start earning! Good luck!
How to Post a Gig on Fiverr Mobile App
Posting a gig on the Fiverr mobile app is a straightforward process that allows freelancers to tap into a global marketplace right from their handheld devices. Here’s a step-by-step guide to help you get started.
Step-by-Step Guide to Post a Gig
- Download and Install the App: Ensure you have the Fiverr app installed on your mobile device. It is available for both iOS and Android.
- Create an Account: If you’re new to Fiverr, sign up using your email or social media accounts. If you already have an account, simply log in.
- Navigate to Selling: Tap on the 'Profile' icon at the bottom right of the screen and select 'Selling' from the menu options.
- Click on 'Gigs': In the Selling section, find and click on the 'Gigs' tab to see your existing gigs or create a new one.
- Add a New Gig: Tap on the '+' button to create a new gig. You will be prompted to fill out essential details:
| Details | Description |
|---|---|
| Title | Craft a catchy and descriptive title for your gig. |
| Category | Select the most relevant category for your gig offerings. |
| Price | Set competitive pricing for your services. |
| Description | Write a compelling gig description highlighting your skills. |
| Tags | Add relevant tags to increase gig visibility. |
After completing the above steps, review your gig details and click 'Publish' to make it live on Fiverr. Remember, a well-optimized gig is crucial for attracting potential clients.
In conclusion, consistently updating your gig with high-quality images and tweaking your descriptions based on buyer feedback can significantly enhance your success on Fiverr. Make sure to monitor your gig performance and adjust as needed to remain competitive in the market.


