
So, you've decided to disable your Fiverr gig, huh? Whether it's due to personal reasons, the need to refocus your time, or simply because you're taking a break, the process isn't as daunting as it may seem. In this guide, we'll walk through the steps to easily disable your gig on Fiverr. Plus, we'll explore some common reasons why sellers might choose to take this move. Ready? Let’s dive in!
Reasons to Disable a Fiverr Gig
Disabling a gig on Fiverr can come with various motivations. It’s crucial to understand the factors that lead to this decision. Here are some common reasons sellers opt to disable their gigs:
- Personal Reasons: Sometimes life gets in the way. Whether it’s health issues, family emergencies, or pursuing other interests, sellers may need to take a step back.
- Overwhelming Demand: If your gig is experiencing a flurry of orders and you feel unable to deliver the quality expected, disabling the gig temporarily might be the best course of action.
- Refocusing Business Strategy: As your skills evolve or market demands change, you might want to shift your focus to different types of services. Disabling gigs you no longer want to offer can help streamline your efforts.
- Quality Control: It's essential to maintain high-quality standards. If you find your current workload affecting the quality of your work, it may be time to disable certain gigs.
- Taking a Break: Everyone deserves a break! Whether it's for burnout recovery, a vacation, or simply to recharge, taking time off can enhance your creativity and productivity.
Understanding these reasons can help you make informed decisions about your Fiverr journey and where you want to take it next. Remember, disabling a gig isn’t the end; it can be a pivotal moment for your growth as a seller!
Also Read This: How to Find a Job on Fiverr: A Complete Guide
Step 1: Log into Your Fiverr Account

Alright, folks! The first step in disabling your Fiverr gig is pretty straightforward: you need to log into your Fiverr account. If you’ve been using Fiverr for a while, this will feel like second nature. But just in case you need a little refresher, here’s how to do it:
1. Visit Fiverr's Website: Open your preferred web browser and head over to www.fiverr.com.
2. Click on “Sign In”: Look for the “Sign In” button, typically found in the upper right corner of the homepage. A simple click on this will take you to the login page.
3. Enter Your Credentials: You’ll need to type in your email address and password associated with your Fiverr account. If you have forgotten your password, don't worry! Just click on “Forgot Password?” to retrieve it.
4. Hit “Sign In”: Once you've entered your details, click the “Sign In” button and voilà, you’re in!
Now that you’re logged in, you’re all set to move on to the next step. Just remember, keep your login details private to ensure your account stays secure!
Also Read This: How to Get Pro Verified on Fiverr
Step 2: Navigate to Your Gigs
Now that you’re logged into your Fiverr account, the next step is to navigate to your gigs. It’s important to know where you’re headed so you can disable the gig quickly and efficiently. Here’s how you do it:
1. Go to Your Profile: Once you're logged in, click on your profile picture or your username at the top right corner of the screen. This will direct you to your profile page.
2. Click on “Selling”: On your profile page, you’ll see a few tabs. One of them will be labeled “Selling.” Click on this tab to explore your selling options.
3. Select “Gigs”: Once you’re in the Selling section, look for the “Gigs” option. This is where all your currently active gigs will be listed.
4. Review Your Gigs: Take a moment to browse through the gigs that you have set up. You’ll want to identify the specific gig you plan to disable.
And there you have it! You’re now in the Gigs section, fully prepared to take the next step. Keep that momentum going, and let’s move forward in this process!
Also Read This: What to Write in Positive Keywords for Fiverr Success
Step 3: Select the Gig You Want to Disable

Alright, now we’re getting to the nitty-gritty! In this step, you'll need to pinpoint the gig you want to disable. It's super simple, but let’s walk through it together.
First, navigate to your Fiverr dashboard. You’ll find yourself at the main page where all your gigs are displayed. It’s like your little shop window showcasing your talents and services! Now, take a look at the list of gigs you have created.
- Locate Your Gigs: Scroll through the list of gigs until you spot the one you’ve been thinking about disabling. Take a second to make sure you’ve selected the right one—there’s nothing worse than accidentally disabling a gig that’s bringing in business!
- Visual Cues: Each gig will have a title, a brief description, and maybe even some reviews. If you're unsure, click on the gig title; this will give you a better view and help you confirm that it's the right gig.
- Gigs in Action: If you see that gig buzzing with orders, just remember that disabling it will put a pause on that income for now—not to worry, you can always reactivate it later!
Once you’ve identified the gig you want to disable, you're ready to move on to the next step, which is just as easy!
Also Read This: How to Reply to an Order on Fiverr
Step 4: Disable the Gig
You’ve made it to the final stretch! Disabling your gig is a straightforward process, and it won’t take much of your time. So, let’s dive into how you can do this.
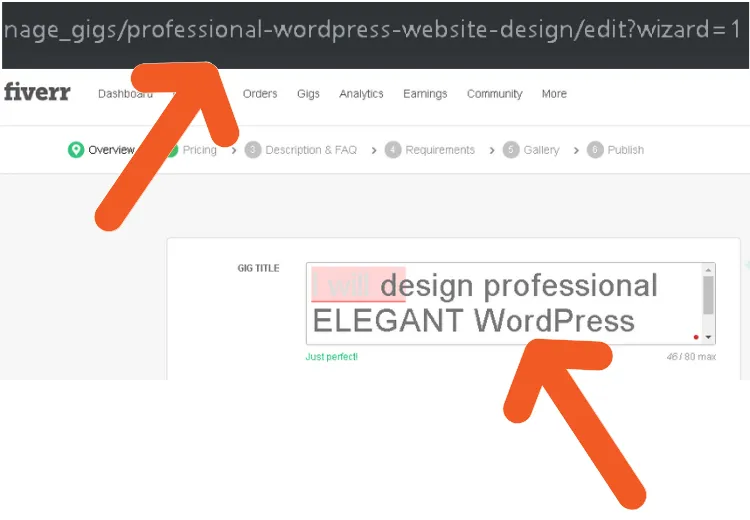
After selecting the gig, look for the Edit button located near the gig title. Click on it, and you’ll be taken to the gig editing page.
- Find the Availability Settings: Scroll down to the section where it discusses availability. This is where the magic happens! Look for the toggle or checkbox that allows you to disable the gig.
- Toggle Off: Usually, you’ll see an option that says something like "Active" with a switch or checkbox. Simply click it to toggle it off. It’s like flipping a switch; easy-peasy!
- Confirm Your Choice: After toggling it off, make sure to scroll down and hit the “Save” or “Update” button. This final step is crucial! If you skip it, your gig will remain active, and you wouldn’t want that.
And there you have it! Your gig is now disabled. You can always re-enable it later when you feel ready to take on new projects again. Remember, the Fiverr community is always here to support you!
Also Read This: Recommended Charge for a Freelance Project Manager
Step 5: Confirm Your Changes
Alright, you’ve navigated through the website, made all the necessary adjustments, and are ready to wrap things up. Step 5 is all about confirming your changes to ensure everything is set correctly. This step is crucial because while it might feel like you’re just clicking a few buttons, it's essential for making sure your gig management is handled properly.
Here’s how to confirm your changes:
- Review Your Adjustments: Before clicking any confirmation button, take a moment to review the adjustments you've made. Double-check if you really want to disable your gig and whether the changes reflect what you intended. It's always good practice to confirm details—trust me, it saves headaches later!
- Click on the Confirm Button: Look for the confirmation button on the screen. This could be labeled as “Save Changes” or “Confirm Disable.” Make sure you hit the right one! By clicking this, you officially instruct Fiverr to take your gig offline temporarily.
- Look for a Confirmation Message: After you confirm, be on the lookout for a pop-up or message that says your changes have been saved. This is a good sign—something like “Your gig has been disabled successfully” provides peace of mind.
And voila! Your gig is now disabled. Remember, if you ever want to reactivate your gig, it’s just as easy to do so!
Also Read This: Why Can’t I Post a Gig on Fiverr? Understanding Common Issues and Solutions
Reactivating Your Fiverr Gig
So, you've taken the bold step to disable your Fiverr gig, but now you're contemplating reactivating it. Perhaps you’ve got fresh ideas, a bustling workload, or just want to make a comeback in the gig marketplace. No worries! Reactivating your Fiverr gig is a simple, straightforward process.
Here’s how you can bring your gig back to life:
- Log into Your Fiverr Account: First things first, log back into your Fiverr account with your credentials. This will take you to your dashboard where you can manage your gigs easily.
- Go to My Gigs: Once you’re in, navigate to the “My Gigs” section. This is where all your gigs, both active and inactive, live. Look for the gig that you previously disabled.
- Select the Disabled Gig: Find your gig from the list, and click on it to access the gig details. You’ll see options you can manage.
- Toggle the Gig Status: Look for the option to reactivate or enable the gig. This may be a simple toggle switch or button that says “Activate.” Just click that, and you’re almost there!
- Confirm Your Changes: Just like when you disabled it, you’ll need to confirm your changes. A confirmation message will usually pop up, confirming that your gig is now active once again.
And that’s it! Your gig is reactivated and ready for business. Whether you tweak the details or keep it as-is, being back in the market means you can start connecting with clients and showcasing your skills once again.
Also Read This: Do I Pay on Fiverr Before the Product is Done?
Common Questions About Disabling Fiverr Gigs
Disabling a Fiverr gig can bring up a variety of questions, especially if you’re new to the platform or have never done it before. Let’s tackle some of the most common questions people have when it comes to this topic.
- Why would I want to disable my Fiverr gig? There are several reasons for disabling your gig. Perhaps you need a break from freelance work, want to update your offerings, or have personal matters to attend to. Disabling a gig allows you to take time off without losing your status.
- Will disabling my gig affect my account? Disabling your gig won’t negatively impact your overall Fiverr account. Your account remains intact, and you can reactivate the gig whenever you’re ready.
- Can I disable multiple gigs at once? Unfortunately, Fiverr does not allow batch disabling of gigs. You’ll need to go through and disable each gig individually, which can be a bit time-consuming if you have several.
- Do I lose my orders if I disable a gig? No, your current orders will not be affected. You will still need to fulfill the orders you’ve received. Disabling only prevents new customers from purchasing that gig.
- How long can I keep my gig disabled? There isn’t a specific time limit for keeping your gig disabled. You can reactivate it whenever you feel ready to return to work.
By understanding these common questions and their answers, you can navigate the process of disabling your Fiverr gig with much more confidence.
Conclusion
Disabling your Fiverr gig can be a straightforward way to take a breather or spruce up your offerings without the pressure of ongoing orders. Whether it's due to personal reasons or a desire to update your services, knowing how to do it properly helps you maintain your reputation on the platform.
To recap, here’s a quick checklist for disabling your gig:
| Step | Action |
|---|---|
| 1 | Log into your Fiverr account. |
| 2 | Navigate to the “Selling” section. |
| 3 | Select “Gigs” from the dropdown menu. |
| 4 | Find the gig you wish to disable. |
| 5 | Click on the “Edit” button. |
| 6 | Scroll down and select “Disable Gig.” |
| 7 | Confirm your choice and save the changes. |
With this step-by-step guide and answers to common questions, you should feel equipped to disable your Fiverr gig successfully. Remember, your skills and expertise will always be valuable, and taking a break can often lead to greater creativity and renewed energy when you return!


