
Are you thinking about changing your Fiverr email? Well, you're in the right place! Whether you’re dealing with an outdated email, want better organization, or just fancy a fresh start, changing your email on Fiverr is a straightforward process. In this guide, we’ll walk you through everything you need to know to successfully update your email address on Fiverr. So, let's get started!
Why You Might Need to Change Your Fiverr Email
There are several reasons why someone would want to update their Fiverr email address. Here are some common scenarios that might prompt this change:
- Outdated Email: Maybe you’ve switched from a personal account to a work account or you just want to use a more professional email for business purposes.
- Better Organization: If you're juggling multiple freelancing platforms, keeping everything in one email account can simplify management and avoid confusion.
- Security Concerns: If your email was compromised or you suspect unauthorized access, it’s essential to update your email for safety.
- Email Provider Changes: Sometimes, you may want to switch to a different email provider due to better features or services. This is a good opportunity to change your Fiverr email.
- Personal Preference: Perhaps you’ve just decided you like a new email address better—it's completely valid!
Whatever your reason might be, it's quite important to ensure that your Fiverr notifications and communication reach you at the right inbox. Could there be better motivation to make a change than ensuring you never miss important updates?
Also Read This: How to Transfer Balance from Fiverr
Step 1: Log into Your Fiverr Account
Changing your Fiverr email starts with logging into your account. But hey, it’s not just about entering your credentials; it’s about making sure you’re accessing the right account. Here’s how you can do it seamlessly:
- Open Your Browser: Whether you're using Chrome, Firefox, or any browser of your choice, launch it.
- Visit Fiverr: Type www.fiverr.com in the address bar and hit enter. You’ll find yourself on the Fiverr homepage.
- Locate the Login Button: Look towards the top right corner of the page. You’ll see a ‘Login’ button. Click on that.
- Enter Your Credentials: Input your registered email and password. Make sure there are no typos. If you’re using a public computer, consider not saving your password.
- Click Login: Hit the ‘Login’ button and wait for a moment. Your dashboard should load swiftly.
And voilà! You’re inside your Fiverr account, ready to make the changes. If you’ve forgotten your email or password, there are recovery options available on that same login page. Just follow the prompts, and you should be good to go!
Also Read This: How to List Yourself as a Listener on Fiverr
Step 2: Go to Account Settings
Now that you're logged into your Fiverr account, the next step is to navigate to your Account Settings. This is where all the magic happens! Here’s a simple guide for you:
- Look for Your Profile Icon: In the upper right corner, you’ll see your profile picture or icon. Give it a click.
- Select “Settings”: A dropdown menu will appear. From there, select “Settings.” It might take you a second to spot it, but it's there!
- Explore Account Settings: Once you’re in the Settings page, take a moment to familiarize yourself with the layout. You’ll see various tabs—General, Security, Notifications, and more.
- Find Email Preferences: Under the ‘General’ tab, you’ll easily spot the option to edit your email address. It’s usually mentioned right at the top, making it quite user-friendly!
By accessing your Account Settings, you're paving the way to updating your email and ensuring that your Fiverr communications are seamless. Take your time here—it’s an important step!
Also Read This: How to Get Recognized on Fiverr
Step 3: Locate the Email Settings
Now that you've logged into your Fiverr account, it's time to find the email settings. This step is crucial because if you don't know where to look, you might waste a lot of time searching for the option. But don’t worry, I’ll guide you through this!
First, navigate to the top-right corner of your Fiverr homepage. You’ll see your profile picture or your avatar. Click on it to reveal a drop-down menu. In this menu, look for the “Settings” option and click on it.
Once you’re in the settings area, you’ll find several tabs on the left side of your screen. Each tab represents different settings for your account. The options you’ll typically see include:
- Account Settings
- Profile Settings
- Notifications
- Security
- Email Settings
What you want to focus on here is the "Email Settings" tab. This is where you’ll be able to see your current email address and make changes. Click on “Email Settings” to access your current email information.
Don't worry, if you lose your way, you can always return to your profile picture and navigate back to settings. Take your time; it's better to be precise than to rush through it!
Also Read This: How to Make an ID on Fiverr: A Step-by-Step Guide
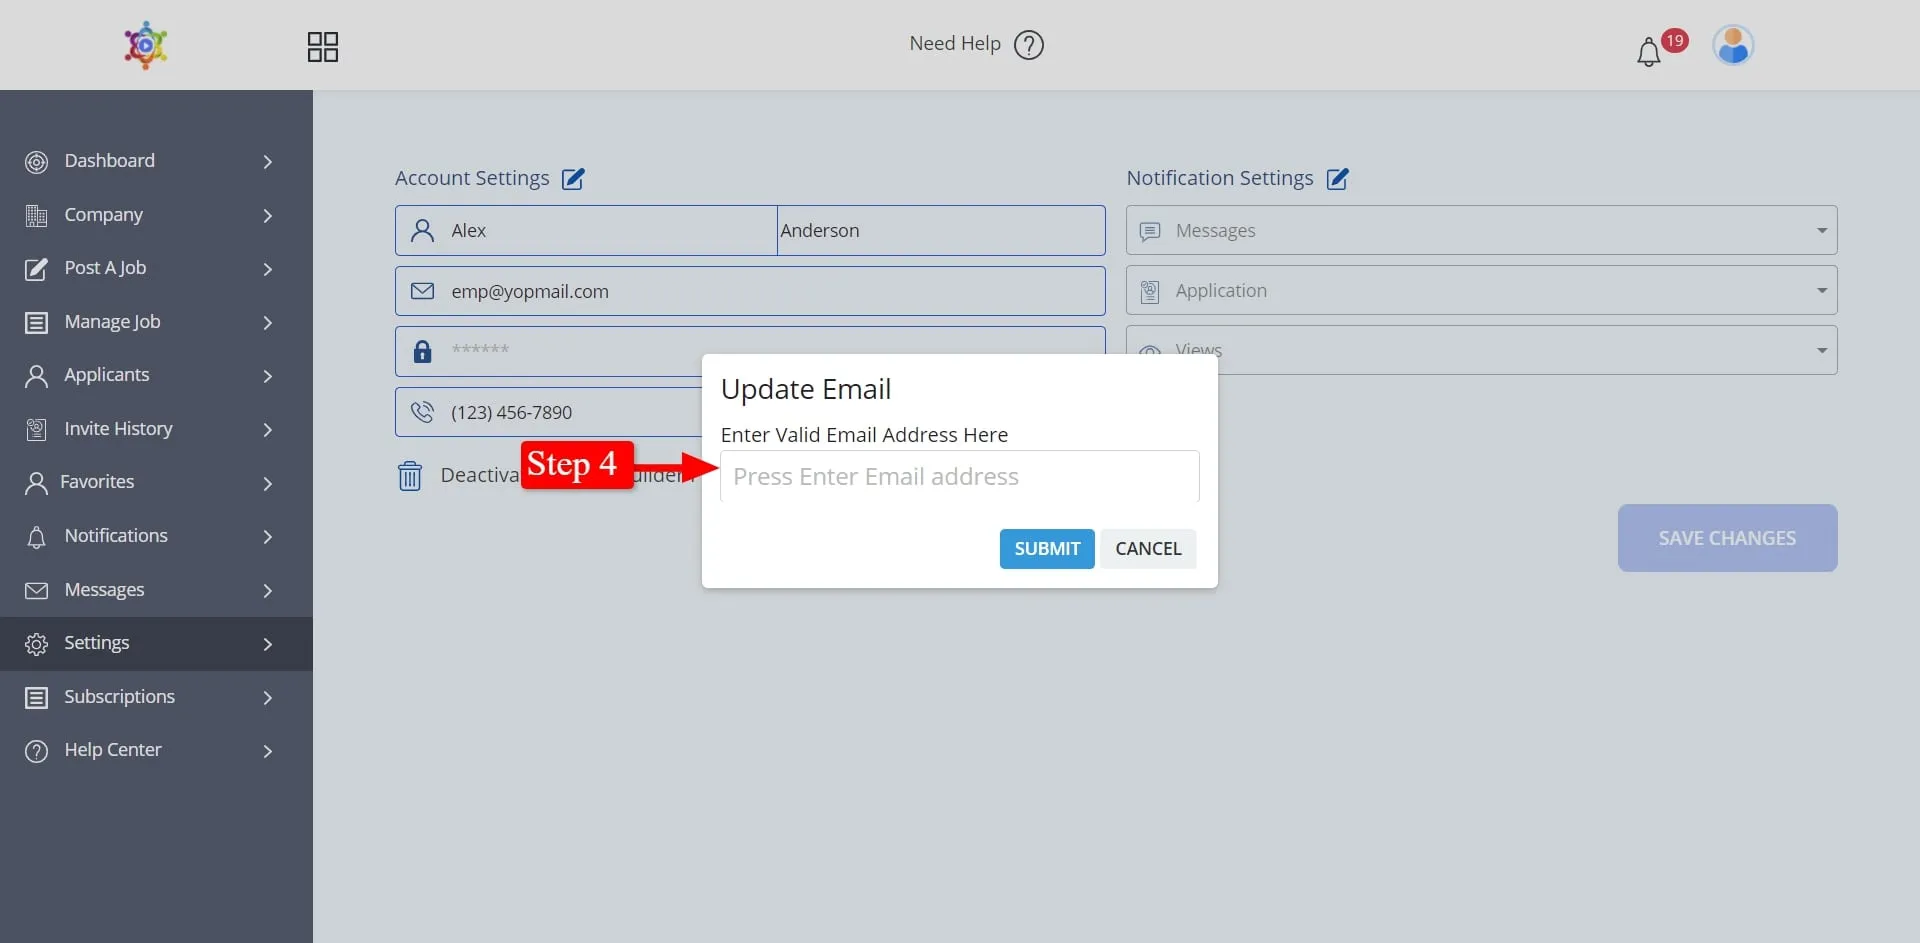
Step 4: Enter Your New Email Address
Great! Now that you’ve found the email settings, it’s time to enter your new email address. This is the moment you’ve been waiting for, and it’s fairly straightforward. So, let’s dive right in!
In the Email Settings tab, you'll see a field containing your current email address. Right next to it, there will be an option or button that says “Change Email” or something similar. Click on that to begin the process of entering your new email address.
In the new field, type out your new email address carefully. Make sure you double-check your spelling—typos can lead to a lot of headaches later on! If you have a confirmation button or an option to save changes, be sure to click that.
After entering your email, Fiverr may prompt you to verify the new address. This typically involves sending a verification email to your new email account. You’ll need to go to your email inbox, find that verification email, and click on the link inside. Here’s what you should do:
- Open your email client and look for the verification email from Fiverr.
- Click on the link in the email to confirm the new address.
- Return to your Fiverr account and check if the changes have been updated.
And just like that, you’re all set with your new email address! It’s as simple as pie!
Also Read This: How to Get Your First Sale on Fiverr
7. Step 5: Verify Your New Email Address
Alright, you've made it this far! Now it’s time for one more crucial step: verifying your new email address. This is super important because it not only confirms that you own the email, but it also ensures that you can receive important notifications from Fiverr regarding your account.
Here’s how you can verify your new email:
- After you’ve successfully changed your email address in the settings, Fiverr will send a verification email to your new address.
- Open your inbox (or possibly the junk folder; you know how sneaky email can be!), and look for an email from Fiverr.
- The subject line will likely say something like “Please verify your email address.” Click on that email.
- Inside, you’ll find a verification link. Click on that link, and it should take you back to Fiverr, confirming that your email is verified.
If you don’t see the email within a few minutes, don’t panic. You can request a new verification email directly from your Fiverr account. Just head back to the settings and look for a “Resend Verification Email” option.
Remember, if you don’t verify your new email, some features might not work until you do. So don’t skip this step!
Also Read This: How to Reach Someone Who Works for Fiverr
8. Troubleshooting Common Issues
Even though changing your email on Fiverr is generally a straightforward process, you might encounter a few hiccups along the way. Let’s address some common issues and how to resolve them.
Issue 1: No Verification Email Received
First off, if you’re waiting for the verification email and nothing appears in your inbox, try these steps:
- Check your spam or junk folder. Sometimes emails can end up there by accident.
- Ensure that you entered the correct email address. A simple typo can lead to email being sent to the wrong place.
- Wait a bit longer. Sometimes email delivery can take a few minutes.
Issue 2: Link Expired
If you clicked the verification link and received a message saying it’s expired, don't worry. Just go back to your Fiverr account settings and request a new verification email.
Issue 3: Can't Change Email Again
If you find that you can’t change your email address right away again, that’s likely due to Fiverr's security measures. In this case, you might need to wait a while before you can attempt to change it again.
In case you hit a snag that you can’t resolve on your own, don’t hesitate to reach out to Fiverr’s customer support! They’re there to help ensure your experience goes smoothly.
How to Change My Fiverr Email: A Step-by-Step Guide
Changing your email address on Fiverr is a straightforward process that can help enhance your account security or address issues related to email accessibility. This guide will walk you through the steps to successfully update your email on Fiverr.
Why Change Your Fiverr Email?
- Lost Access: You may have lost access to your previous email.
- Security Reasons: It's good practice to update your email regularly for security concerns.
- Professionalism: Using a more professional email can enhance your brand image.
Step-by-Step Guide to Change Your Fiverr Email
- Log into Your Fiverr Account: Visit the Fiverr website and enter your login credentials.
- Go to Settings: Click on your profile picture at the top right corner and select “Settings” from the dropdown menu.
- Select Email Preferences: In the settings menu, find the "Account" tab, and click on "Email Preferences."
- Change Your Email: Locate the field with your current email address. Enter your new email address in the provided field.
- Verify Your New Email: Fiverr will send a verification link to your new email address. Check your inbox and click on the verification link.
- Confirmation: Once verified, you will see a confirmation message, and your email will be updated.
Things to Keep in Mind
Make sure to check your spam/junk folder if you don't receive the verification email. Also, ensure that your new email account is secure and has a strong password.
Common Issues
| Issue | Resolution |
|---|---|
| Verification Email Not Received | Check your spam folder and ensure you entered the correct email. |
| Access Denied | Ensure you are logged into the correct Fiverr account. |
Changing your Fiverr email is crucial for maintaining account security and ensuring effective communication. By following the above steps, you can easily update your email and continue enjoying the benefits Fiverr offers.


