
If you're diving into the world of freelancing on Fiverr, you're probably looking for the best ways to manage your earnings. One of the most popular ways to get paid is through Payoneer. Integrating Payoneer with Fiverr opens up a world of convenience, allowing you to withdraw funds easily and efficiently. In this blog post, we’ll walk you through the process and explore the reasons why using Payoneer is a fantastic option for Fiverr sellers.
Why Use Payoneer for Fiverr?
When it comes to receiving payments on Fiverr, the choice of payment method can make a significant difference in your overall experience. Payoneer stands out among the crowd for several reasons. Let’s break it down:
- Global Reach: Payoneer facilitates transactions in multiple currencies, making it a perfect solution for freelancers working with clients around the globe. You can receive payments in different currencies without stressing about currency conversion fees.
- Low Fees: Compared to traditional banks, Payoneer offers lower fees for international transfers. This means more money stays in your pocket, unlike if you were to use other payment processors.
- Fast Withdrawals: One of the most appealing features of Payoneer is the speed of withdrawals. Your earnings can be transferred quickly to your local bank account, sometimes within the same day!
- Multi-Channel Payments: If you earn money from multiple platforms, Payoneer allows you to manage all those payments from a single account. This means less confusion and better control over your finances.
- Payoneer Prepaid Mastercard: With the Payoneer Mastercard, you can access your funds almost immediately. Feel free to make purchases online or withdraw cash at ATMs—it's just that easy!
In summary, using Payoneer for Fiverr not only simplifies the payment process but also enhances your overall freelancing experience. Whether you’re new to the platform or a seasoned seller, adding Payoneer to your arsenal is a smart move!
Also Read This: How to Join Fiverr Studio: A Step-by-Step Guide
Step 1: Create a Payoneer Account

If you're looking to connect Payoneer with Fiverr, your first move will be to create a Payoneer account. Don’t worry; it’s a straightforward process! Let’s walk through the steps together.
1. *Visit the Payoneer website: Head over to Payoneer.com. You'll find a bright button that says "Sign Up." Click on it!
2. Choose your account type: Payoneer offers various account types. Since you’re using it for Fiverr, select the option best suited for freelancers.
3. Fill in your details: You'll need to provide some basic information like your name, email address, and country of residence. Make sure everything is accurate to avoid complications later.
4. Set a strong password: Create a password that’s both strong and memorable. A mix of letters, numbers, and symbols usually does the trick!
5. Submit your application: After filling out all the necessary fields, click on "Sign Up" or "Submit" to send your application off.
6. Check your email: You’ll receive a confirmation email; be sure to click on the link provided to verify your email address.
And voila! You’ve just created your Payoneer account. Now, let’s get it verified so you can start using it with Fiverr.
Also Read This: How to Change Withdrawal Method on Fiverr
Step 2: Verify Your Payoneer Account
Verification is a crucial step in ensuring that your Payoneer account is ready for business. Here’s how to do it:
1. Log in to your Payoneer account: Use the credentials you just created to access your account.
2. Navigate to the verification section: Once logged in, look for the notifications or account verification section. Payoneer will guide you through what’s needed for verification.
3. Provide necessary documents: You may be asked to upload various documents, including:
- Proof of Identity: A government-issued ID such as a passport or driver's license.
- Proof of Address: Utility bills or bank statements that show your name and address.
4. Follow the uploading instructions: Make sure the documents are clear and legible - this speeds up the verification process!
5. Submit your documents: Once you’ve uploaded everything, hit the “Submit” button.
6. Wait for confirmation*: Payoneer usually takes a few hours to a few days to verify your account. You’ll receive an email once it’s done.
After verification, you’re on your way to linking Payoneer with your Fiverr account! Easy peasy, right?
Also Read This: When Do I Get My Money from Fiverr?
Step 3: Log in to Your Fiverr Account
Alright, let's kick things off by logging into your Fiverr account. This step is pretty straightforward, but let’s make sure we're doing it right. First, grab your device - whether it's a desktop, laptop, or even your smartphone. Now, head over to the Fiverr website. You’ll find the login button perched at the top right corner, inviting you in.
Once you click that login button, you'll need to enter your email address or username along with your password. It’s like opening a door to a world of freelance opportunities! If you happen to forget your password, don’t sweat it. Fiverr has a handy "Forgot Password?" link that’ll guide you through resetting it.
Once you’re logged in, take a moment to familiarize yourself with your dashboard. Here, you’ll see your active orders, notifications, and even some helpful insights to improve your gigs. You're all set to move on to the next step. Exciting, right?
Also Read This: Becoming a Freelance Marketing Consultant
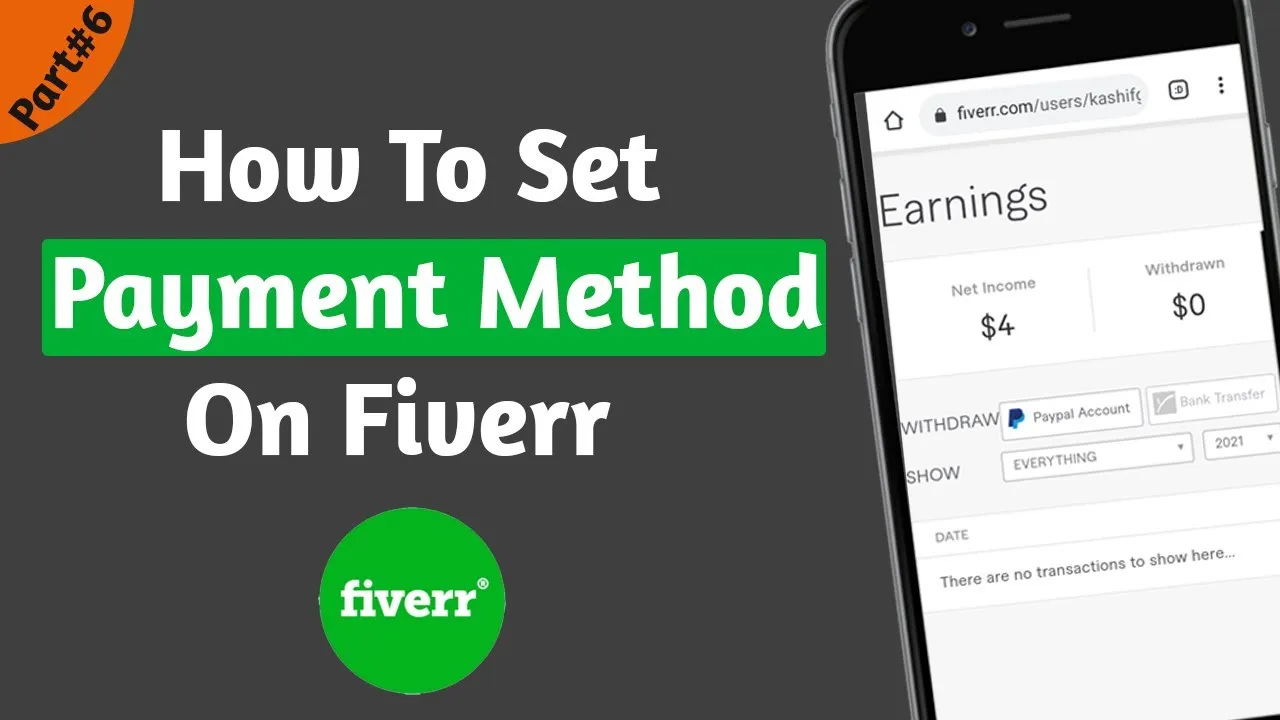
Step 4: Navigate to Payment Settings
Now that you’re logged in, it’s time to get down to business! You need to find where to update your payment settings. On the left side of your Fiverr dashboard, you’ll see a vertical menu - it’s your navigation guide. Click on your profile picture or username to open a dropdown menu.
Next, look for the option labeled "Settings." This will take you to a new page where you can customize various aspects of your Fiverr experience. Among these options, you’ll find “Payment Settings.” Go ahead and click on that. It's usually right there, just waiting for you to explore it!
To make it easier for you, here’s what you should expect:
- Overview of Payment Methods: Here, you can see the payment methods you currently have linked.
- Add a New Payment Method: This is where you’ll integrate Payoneer into the mix.
Once you navigate to the Payment Settings, you’ll be ready for the exciting part - connecting Payoneer. Remember, smooth sailing ahead!
Also Read This: Top 10 Data Analysts on Fiverr in 2024
Step 5: Select Payoneer as Your Payment Method
Alright, you’ve made it to the exciting part! Now that you’ve got your Fiverr account set up and ready to go, it’s time to choose Payoneer as your payment method. This step is crucial because it allows you to receive your hard-earned money seamlessly. Here’s how to do it:
- Log in to your Fiverr account.
- Navigate to your Profile by clicking on your profile picture at the top right corner.
- Select Settings from the dropdown menu.
- Once in the settings, click on the Billing tab to explore your payment options.
- You’ll see a section labeled Payment Method. Here, you’ll find various payment options like PayPal, direct bank transfer, and of course, Payoneer.
To select Payoneer, just click on the Connect or Add Payment Method button next to it. A new window will pop up, guiding you through the linking process. It’s that simple! Just keep in mind that you’ll need to have a Payoneer account ready to go for the next step.
Also Read This: How Many Gigs Can a New Buyer Create on Fiverr?
Step 6: Link Your Payoneer Account
Now that you've chosen Payoneer as your payment method, it's time to link your Payoneer account. This is a vital step because it allows Fiverr to transfer your funds directly to your Payoneer account, making the whole process smooth and efficient. Here’s a simple breakdown of how to link your account:
- In the pop-up window where you selected Payoneer, you will see an option to Log In to Payoneer. Click on it.
- A separate login page will appear. Enter your Payoneer email and password.
- Once logged in, you may need to authorize the connection between Fiverr and Payoneer. Just follow the prompts on your screen!
- Once authorized, you’ll be redirected back to Fiverr, confirming that your Payoneer account is linked.
And there you have it! Your Payoneer account is now linked, and you’re ready to start receiving payments for your exceptional services on Fiverr. Isn’t that fantastic? Now you can focus on what you do best, knowing that your payments are in good hands!
Also Read This: Can I 1099 a Person I Hire from Fiverr?
Step 7: Confirm Your Payment Method
Now that you’ve gone through the process of adding Payoneer to your Fiverr account, it’s time for the final check—the confirmation of your payment method. This step is crucial because it ensures that all your hard work in setting up the payment system is recognized and functional. Let’s break it down step by step!
- Review Your Payoneer Details: Start by ensuring that all your Payoneer account information is correctly entered in your Fiverr profile. This includes your Payoneer email address and any additional relevant details.
- Check for Verification: Fiverr will typically send a notification or email asking you to verify your Payoneer account. This small step will give you peace of mind that everything is set up correctly.
- Look for Confirmation Messages: Once you’ve completed the Payoneer integration, keep an eye on your Fiverr account dashboard. A confirmation message should appear, confirming that your payment method is active.
- Try a Test Payment: If you’re feeling adventurous, try making a small transaction or withdraw a tiny amount. This could be a great way to verify that everything is working smoothly.
Remember, confirming your payment method successfully means more efficient transactions in the future, allowing you to focus on what you do best—providing great services on Fiverr!
Also Read This: Why Is My Review Hidden on Fiverr?
Troubleshooting Common Issues
Even the best-laid plans can hit a snag! Here are some common issues you might encounter when trying to link Payoneer to Fiverr, along with some tips to help you troubleshoot them effectively.
| Issue | Possible Solution |
|---|---|
| Payoneer account verification takes too long | Reach out to Payoneer support for assistance. Sometimes, they might require additional documentation to complete the verification. |
| Error message while linking accounts | Double-check your Payoneer details. Ensure that the email and other information are correct, and try again. |
| Payment delays or issues | Check your Payoneer transaction history to ensure no pending issues. If the problem persists, contact Fiverr support for help. |
| Non-acceptance of Payoneer on Fiverr | Make sure you’re in a country where Fiverr actually supports Payoneer. If Payoneer isn’t available, you might need to consider alternative payment methods. |
Don't be discouraged! Technical hiccups happen to everyone. With a little patience and the right steps, you'll be cruising through Fiverr transactions in no time!
How to Add Payoneer to Fiverr
If you are a freelancer using Fiverr, setting up your payment method is crucial for receiving funds for your hard work. Payoneer is a popular choice due to its global reach and ease of use. Here’s how you can add Payoneer to your Fiverr account in a few simple steps.
Step 1: Create a Payoneer Account
If you don’t already have a Payoneer account, visit the Payoneer website and sign up. You’ll need to provide personal information, including your name, address, and bank details. Verify your account as required.
Step 2: Access Your Fiverr Account
Log in to your Fiverr account. If you're new to Fiverr, create an account and set up your profile to start offering services.
Step 3: Go to Revenue Settings
| Menu | Action |
|---|---|
| Profile | Click on your profile picture at the top right corner. |
| Settings | Select "Settings" from the dropdown menu. |
| Payment Methods | Choose the 'Payment Methods' tab. |
Step 4: Add Payoneer as a Payment Method
In the 'Payment Methods' section, look for the “Add a Payment Method” button. Click on it and select Payoneer. You’ll be prompted to enter your Payoneer account details.
Step 5: Confirm the Changes
After entering your Payoneer details, confirm the changes. You may receive a confirmation email from Fiverr and Payoneer. Check your account for the successful addition of Payoneer.
Now you're all set! You can receive payments from your Fiverr earnings directly into your Payoneer account.
Conclusion: Adding Payoneer to Fiverr enhances your payment options and ensures a smooth transaction experience, allowing you to focus on your freelancing work without financial concerns.


